Showing posts with label classroom management. Show all posts

Saturday, September 27, 2014

The Easiest Way to Implement a Classroom Economy

As my life continues to get crazier, I am constantly looking for ways to simplify and improve the things that I do. This year, for example, I decided to merge Class Dojo with my classroom economy, and so far, it's going very well! Here are some of the tweaks I made to make this merger work.

My Classroom Economy

I've been using a classroom economy since I started teaching, and every year, I make a few tweaks. The basic idea is that every student applies for a class job at the beginning of each term (our terms are 6 weeks long). I've previously posted about my classroom jobs here. I display the jobs in my classroom so that we're constantly reminded who is responsible for what. This year, I've used a pocket chart for my classroom jobs (sorry for the blurry photo).


I used to give students $100/week as their salary, or about $20 per day. They'd have weekly and monthly expenses, and then they could use any remaining money to purchase items in our class store. The complete program is detailed in my Classroom Economy Megapack on TpT.


I love the system, but I felt like I wasn't as consistent as I wanted to be in tracking student behaviors to give fines or bonuses, and there were many Friday afternoons when I was so involved in whatever we were working on that day, that I just didn't leave enough time for them to shop. 

Meanwhile, I was dabbling with Class Dojo, and I wanted to figure out a way to tie that in as well. If you're not already familiar, Class Dojo is an online behavior management system that allows you to give and take away points from students. You can create your own categories for points, and you can access the class info from any device -- laptop, computer, iPad, iPhone, etc. I liked that portability because I always have one of those devices in my hands, and I could give or take away points without really interrupting what I was doing. 

The solution came for me this year when Class Dojo allowed for the creation of weighted point values! Before, you could only give or take away a single point at a time. Now you can create points on a scale of 1-5 and weight particular behaviors accordingly. This is done in the set-up for behaviors. 

1. Go to Edit Class on your class screen and select "Edit students and behaviors."


2. Select "Behaviors" and either click on one of the exiting behaviors, or the plus symbol to customize the behaviors.


3. Change the icon (optional), name or rename the behavior, and then click the box to access a pull down menu of point values to weight that item.


And that's it! You can weight both the positive and negative behaviors according to your needs. Here are the settings I have now for my classroom economy.

I basically divided the $100 weekly salary by 10, and scaled everything else back the same way. Students now get 2 points daily for their salary (10 points per week) and bonuses for different behaviors. The only other positive behavior that I've weighted more currently is helping others because I'm really trying to encourage that in my classroom. I'm also going to add a +4 for a class compliment because I like when they do a good job with other adults in the building.


For negative behaviors, I deduct more points for breaking rules outside of my classroom and for disrespecting people or materials. I also now deduct their taxes and rent through Class Dojo, and when they shop, I deduct their points in here. I price everything in multiples of 2, but then I found that I wanted a -5 shopping once they had enough points for some of the larger ticket items in our class store. I dislike that it shows up in the "Needs Work" tab, but I don't think it's a problem overall. The parents know what is happening from the descriptors, and we just talk about it in class from the stance of making or spending money. It's the easiest way to deduct some points without resetting the points entirely.

Since transitioning to this modified system 7 weeks ago, my classroom economy has become more accurate and effective in a fraction of the instructional time. Class Dojo has replaced the clip chart that I used to use, and it helps with some of the accounting. I'm still using the bulk of the resources from my Classroom Economy Megapack, however.

If you're interested in trying out Class Dojo with the rest of my Classroom Economy Megapack, I'll be offering the product on sale at half price through Tuesday. It is one of my best sellers, and if you're looking to change up your classroom management routines or enhance your existing classroom economy, I don't think you'll be disappointed. I've also discounted the rest of my TpT store 20% to celebrate my return to blogging after a busy start to the school year. Those sale prices will go now through Tuesday, so check them out!

Join the Mailing List! 

Did you know that I have a mailing list so that you'll never have to miss a post? Use the link at the top right of this page (under Never Miss a Post) to subscribe to my mailing list. You'll get my posts delivered to your inbox, and you'll also get access to some extra resources that I'll be offering to my mailing list only. Given that my PhD work has really cut in to my blogging time this past year, the mailing list is the best way to make sure you see my new content. I promise not to spam you or share your contact information ever. 

Have a great week!

Thursday, March 27, 2014

5 Tips to Make Your Paperless Classroom Work

I'm now more than 3/4 of the way through my year of 1:1 iPad work with fourth graders, and while I hoped to have a paperless classroom, the reality has been a bit different. We're definitely using less paper than we would without iPads, but I can't pretend that we're paper-free. As I reflect on this school year, here are five things I would do differently next year to make the paperless transition go even better.

1. Begin the year with a typing boot camp.
The biggest obstacle to the paperless classroom at the beginning of fourth grade is simply that the kids (for the most part) don't know how to type. Tasks that should have been quick ended up taking 3-4 times the length that I'd anticipated just because the kids were hunting for keys on the keyboard. I think if I'd spent the first term of the year working on typing skills, it would have made a big difference. And on a related note, I'd encourage students to get bluetooth keyboards to use with their iPads (assuming the school won't invest in those, too).

2. Transition gradually.
When my students start fourth grade, they come from a school that does not have 1:1 iPads. As a result, the technology integration is a big adjustment--for both students and parents. Going fully paperless can be a huge culture shock for the students, and the transition can produce some anxiety. Even with tech-savvy students, there can be a huge learning curve with different apps, and it can quickly get frustrating for some kids--especially the ones who were very comfortable with school as they previously knew it. Start small with a few key apps (e.g., Edmodo, Evernote) and build from there.


3. Try to give options.
Some students are far more comfortable with the iPads than others, and sometimes their lack of comfort can impact their work. With writing, for example, I've learned to give students the option of drafting on paper, even though there are lots of mind-mapping and word processing apps they could use for drafting. Usually once they have that first draft on paper, they're more comfortable typing it in to make revisions and edits. For some of my students, that flexibility makes a huge difference in the amount of writing they can endure. For other students, the iPads boost productivity. Either way, we know that choice is important to students, and this is another important way to differentiate in a 1:1 classroom.


4. Don't force it.
There are still some contexts where it makes more sense to use paper. Math tests are one example for me. I don't tend to give students multiple choice tests in math, and I want them to have plenty of space to show their work. Yes, they could do the work on GoodReader with a stylus and turn it in on Edmodo, but that's not necessarily more efficient for me to grade--especially on a multipage test. Similarly, we're still using paper and a notebook for our word study work. We use differentiated spelling lists with Words Their Way, and I want students to go through the practice of sorting and recording their words each week. Paper makes sense for that.

5. Stay flexible, and have a backup plan.
At the beginning of the year, we were using our iPads for almost everything (we still are). But then I got sick, and I had to write sub plans. I never know who I'm going to have as a sub, but there are two things that are certain: 1) the sub will never be as comfortable managing a class full of iPads as I am, and 2) students will be more apt to misbehave when they have a sub. As a result, I don't usually include the iPads in my sub plans unless I know that there will be someone there to enforce my expectations (e.g., someone I co-teach with or my student teacher). If students expect to use the iPads for everything, it can really throw a wrench into the system to take those away, even for a day. Therefore, it's important to be flexible with using them throughout the year so that students aren't dependent on them. Sure, they might have a preference, but they need to be able to function without them. That's also true for times when the power goes out, the internet goes down, or a software glitch makes the iPad temporarily unavailable.

Any tips to add? I'd love to hear your thoughts in the comments section.


This post contains affiliate links, but I only recommend products or services I use personally and believe will add value to my readers. I am disclosing this in accordance with the Federal Trade Commission's 16 CRF, Part 255: "Guides Concerning the Use of Endorsements and Testimonials in Advertising."

Wednesday, March 26, 2014

The Amazing Power of Focus

I frequently like to put on music while I work, and I sometimes do that in my classroom, too. I've rotated through many Pandora playlists, and I use Spotify a fair amount. I like the music on those sites, but they're more for entertainment than work.

I've finally found a resource that really seems to help me and my students get into the zone and focus.

Let me introduce you to my favorite new website, Focus@Will.

This website allows you to listen to instrumental music from a variety of genres that has been specially selected to get you into a state of "flow." The music is sequenced in an order that draws on neuroscience and research about the impacts of music on productivity. They have a huge section documenting the science behind the playlists. 

I tried this site while reading some really dense texts for a PhD class, and I really felt like it helped me stay focused and productive. I cruised through the articles in record time! I also had it playing while I worked on writing this morning, and I do feel like it's impacting my personal productivity. It seems to be helping my students as well. 

They have two membership levels -- a free version and a paid version. The free version gives you 60 minutes of each playlist before stopping. You can listen to the playlists multiple times, but it will always be the same playlists. The paid version allows you to set a timer, customize playlists, listen to unlimited music, and track productivity for $4.99 billed monthly or $45 billed annually. I'm currently using the free version, but I suspect it won't be long before I upgrade. It's having a big impact on my productivity. 

If you like to have music on in the background while you or your students work, I'd definitely recommend giving Focus@Will a try. I'd love to hear about your experiences with it in the comments!


I like www.focusatwill.com so much that I've become an affiliate with the site. This means that if you click the links above and subscribe, I'll receive a very small commission. Regardless, I only recommend products or services I use personally and believe will add value to my readers. I am disclosing this in accordance with the Federal Trade Commission's 16 CRF, Part 255: "Guides Concerning the Use of Endorsements and Testimonials in Advertising."

Monday, July 29, 2013

Preparing for a Paperless Year!

I am in full-blown pre-planning mode. We officially reported back to school on Thursday, and I'll have 27 fourth grade students in my classroom on August 1. It's crazy to think about how fast this summer has gone and how much work is still ahead.

This will be the first year that I will attempt to go paperless from day 1. Last year, we only had 1:1 iPads for the last 6 weeks of school, so it was after we had established many of our routines and procedures for the year. As I prepare for this shift, I'm linking up with the Tune into Technology linky to share my plans for management and organization.

Managing the Students

1. Number the technology
I assign students numbers 1-27 on the first day of school. We use these numbers for everything -- mailboxes, book bins, lining up, etc. We'll also use them for the iPads. Each student will be assigned the iPad corresponding with their number, so they'll always know which one to use and which slot to put it back in when we clean up.

2. Build Classroom Norms and Routines
We'll develop some essential agreements about the iPads before we even get them out. I'll let the students decide on the rules, with a little extra guidance as necessary. The items that we'll need to touch on will include:
  • how to get the iPad out of the cart
  • moving around the classroom with the iPad
  • using the iPad appropriately (following directions, etc.)
  • putting the iPad away
You can read my previous posts on this here and here.

3. Develop a common vocabulary for the buttons and gestures, and teach some basic actions.

We'll talk about the different buttons on the iPad and their functions. We'll also talk about how they can be used together to take screenshots and quickly navigate from one app to the next. For more information about how I do this, check out my TpT freebie (the very first thing I ever made for TpT!).

4. Give time to explore
The first writing assignment my students will have this year will be to write an informational piece (either descriptive or how-to) about an app of their choosing. By giving them this assignment, I'm giving them time to play around with the iPad and explore the available apps while also getting a baseline writing sample. This has the added benefit of cultivating "experts" about the different apps among the students.

We actually start school on a Thursday this year, and I intend to get all of this started during those first two days.

Organizing Myself

As I prepare for my paperless year, there are a few items I'm working on before the students even arrive. This will help me be ready to go on day #1.

1. Create a stack of Evernote notebooks for all of my students.


I'm planning to keep all of my conferring notes, work samples, and other relevant data in Evernote this year. To prepare for that, I've created an Evernote notebook for each student, and I have them clustered together in a "stack" so that all of my homeroom students are together.

Since I anticipate using this system for many years, I'm formatting the notebook names as "2013 - Last name, First name." That way, I won't get confused when I'm quickly looking for the notebooks for this year's students as opposed to last year's. I've also created one additional notebook called "2013-2014 Overview." Listing both years ensures that the notebook will be on top of my stack when they're sorted alphabetically, and I'll use this notebook to keep track of notes and documents that pertain to the whole class. 

You can read more about setting up Evernote notebooks in my paperless series.

2. Create a checklist template for my class.


This will also be done in Evernote.

I like to have a checklist of my class roster available whenever I'm collecting forms or tracking important information. I'll make a blank checklist now, and then I can copy and paste it into future notes as needed. This is a huge time-saver down the road for me.

3. Make sure that my Dropbox folders are set up for distributing student work.


Although there are plenty of learning management systems available, I strongly prefer Dropbox for distributing assignments to students just because it's so easy on my end. All I had to do was create a folder titled "Student Assignments."

Once the daily folders are set up within the Student Assignments folder, I can share all of the folders through a link on my class website, and students can easily access everything they'll need for daily assignments. To read a complete step-by-step tutorial for how to do this, check out my previous post.

Since I set this up at the end of last year, all I needed to do was empty out the assignments I gave to last year's class so that I can start fresh this year.

4. Create a class on Class Dojo.


Class Dojo is an excellent online classroom management app that I'll be utilizing more this year. I'll tell you more about how I'm integrating it with my classroom economy in a future post, but for now, all I need to do is input my student roster and print out home access codes for my students and their parents. Then it will be all set to go.

5. Create a new group on Edmodo and prepare a welcome message.


(Edmodo has totally changed its app icon, btw. Check it out!)

I'll be using Edmodo to collect student assignments, give quizzes, conduct class discussions, and take polls. I'll need to have a group code ready to give students for the first day so they can sign up, and I'll want them to have something to see and do immediately when they log in for the first time.

****
Once I finish these 5 steps, I think I'll be ready to start the year. I have to admit, I find prepping for a paperless classroom far easier than what I experienced in the past. I'm looking forward to going on this journey with my students this year, and I can't wait to share all of the learning we'll have in store for us. It's going to be a fantastic school year!

Can't wait to read about how others are organizing and managing technology in their classrooms. Be sure to check out the other posts in the Tune into Technology linky, and have a great week!

Sunday, June 2, 2013

Number Talks Chapter 1 - Thumbs Up for the Silent Thumb

I'm linking up with my friend Misty over at Think, Wonder, & Teach for her summer book study of Number Talks: Helping Children Build Mental Math and Computation Strategies, Grades K-5

Given that I'm wrapping up a K-5 Math Endorsement this month, this is a timely book for me. I love to teach math far more than I ever anticipated that I would when I entered this profession, and I really enjoy getting students to share and discuss their mathematical thinking. I've noticed, however, that many students lack strong mental math and computation strategies, relying instead on memorization to get them by. By the time they get to 4th grade, that's not really a viable strategy anymore. They're starting to work with much larger numbers, and they subsequently have more parts and steps to keep straight in their heads. If they don't have great mental math strategies going, then it's likely to become a mess pretty quickly. They can always solve problems on paper, but unless they have the good number sense that goes with doing mental math, they'll never be able to gauge the reasonableness of their answers. In those regards, this book seems like a great idea.

Chapter 1 really just introduces the concept of a number talk, and Misty does a great job summarizing it, so I won't go into that here. One of my favorite teaching ideas from the book so far, however, was the idea of the "Silent Thumb." When students are given a mental math problem, they need some "think time." But every class has 2-3 students who are super math-letes who have the answer before the rest of the class has even processed what problem they're being asked to solve, and those kids with their proud "I know! I've got it!" hand-waving typically end up dominating the conversation. The "silent thumb" solves that problem. All students hold their hand in a fist over their chest as they solve the problem. When they've got an answer, they move their hand from a fist to a "thumbs up." They then think of another strategy to solve it while the other students are thinking, and for each additional strategy they come up with, they extend a finger. Awesome, right? I love how this gives all students some think time without creating pressure for some kids to hurry up because the fist is held close to the body -- not waved in the air for everyone else to see. It also validates those super math-letes for their mathematical thinking by allowing them to communicate to the teacher that they have multiple strategies for solving the problem. And if they don't have multiple strategies, then they have something to think about while the others are working.

I'm definitely interested in learning more about Number Talks, and I'm excited to delve into this book a bit more. I'll be posting more about this book in the weeks to come as I link up with Misty's book study.

If you don't currently have a copy of Number Talks, you can still read the first chapter online. The book is a little bit pricier than most professional development books, but it comes with a DVD full of examples and it has a lot of resources packed in the text. If you're looking to increase students' mental math abilities, then this could be a great resource to use.

Be sure to check out Misty's Number Talks chapter 1 linky party where you can add some ideas of your own or read what other teacher bloggers are saying about the book. I promise you'll find some great ideas there!

And click here to see my review of Chapter 2!


Have you ever done Number Talks in your classroom? I'd love to hear about your experiences in the comments section!

Thanks for reading,

Saturday, January 5, 2013

Busy Weekend & Bathroom Break Freebie

I feel like my two days with students last week were really just a warm-up to what comes next. Monday will start our first real week of the new term, and that's when I'm planning to implement some new strategies and policies in the classroom. I'm thinking about revamping a lot of what I do in my reading and writing block (more on that later), but I'm also going to be cracking down more on students who abuse privileges. For example, we have several scheduled bathroom breaks throughout the day: before school (we start at 7:45), between reading & math at 9:30, before recess at 11:40, after lunch at 12:30, and if needed, right before dismissal at 2:30. Despite these opportunities, I still have students who ask to go multiple times throughout the day. They always insist that it's an "emergency," and while I'm highly skeptical that we share the same definition of that term, I've seen too many accidents among fourth graders over the last couple years to question it. Surely, though, the students are taking advantage of my relaxed policy, and some of them are missing out on valuable instructional time because of it.

I recently saw Stephanie's post over at Teaching in Room 6 about Managing the Bathroom, and it was a real flash of genius. I, too, have a classroom economy in place, and the idea of selling the students additional bathroom passes seemed like a brilliant idea. I know many of my students will buy them just in case, and it will definitely curtail some of my frequent bathroom/water fountain visitors. (If students have a genuine medical issue, this policy won't apply to them.)

I introduced the item before opening my class store yesterday, and not surprisingly, it was met with some controversy. My frequent bathroom-goers were outraged that I would make them buy a pass, but many of my other students spoke up in defense of the policy. In the end, the nay-sayers gave in, and several orders for bathroom passes were placed once the students started shopping.

I wasn't quite on my game enough to make and order the bathroom passes through VistaPrint like Stephanie did, so I made my own this morning, and I'm sharing them as a freebie. Click the image below (or click here) to get the passes from my Google Drive.


In other developments, I think the rest of this weekend is going to be spent getting organized for this term. I'm starting several new units, and I really want to map it all out and plan as much as I can so that I'm not rushing around doing everything at the last minute. I also have lots of thank you cards to write because my class spoiled me tremendously before the break.

What new policies or routines are you excited about implementing this year?

Saturday, October 27, 2012

Weekend Reading - October 27, 2012

Here are some of my favorite teacher blog posts that I read this week:
While I wish I had some grandiose and fun plans for this beautiful fall weekend, I will be sitting home at my desk grading papers, writing report cards, and preparing for next term's units. We have 6 six-week terms, and therefore six grading periods throughout the year. Most of the time, we have a week long break between each term (which I LOVE...), but this term, we don't have a break until Thanksgiving. We did all of our end of term assessments last week, and I now have until Halloween to grade them all and write report cards for my 25 darlings, as well as prepare for entirely new units in all of the subject areas. To say that I'm a little overwhelmed by the prospect would be an understatement. 

How do grading periods and report cards work where you're at? How much time do you typically have between the end of the term and the completion of report cards? I'd love to hear about it in the comments section!

Monday, October 15, 2012

Management Monday: Displaying Student Work

This year, I'm trying something new for displaying student work in my classroom, and I just wanted to share. Meet my new classroom wall display:

I printed each student's name on a piece of card stock, and then had the students color and decorate the page however they wanted. I then laminated them and punched a hole in the corner so I could attach a 2" ring clip. Next, I used Command hooks to hang all of the students' cover pages.


At the beginning of the year, I displayed the cover pages because it was a good way to get to know more about the students and their interests based on what they had drawn or written or how elaborate their illustrations were. Now, as the year has gone on, I'm letting students choose what work they want to have displayed. They can just attach a finished piece to the ring and turn to that page of work.

Here's why I like this system:
- It creates a portfolio of student work. We're constantly adding things behind the cover page, and it's easy to pull it down when I need to have parent-teacher conferences or find work samples for students.
- It gives students some control over what work is displayed. Rather than have one uniform cute bulletin board with all of my students' work on it, my students are able to choose lots of different things to put up, and they can showcase the work they are most proud of even if there are other things in the pages behind that work.
- It's easy to change out. I don't have to deal with stapling anything or removing staples to change out the display. I can hand the students their ring and cover, and they can change it out themselves and hang it back up when they're done.

There's no question that it takes up a lot of wall space in my classroom. That's one definite downside of it, but I feel like it's a good use of wall space, and it definitely helps me do a better job with displaying student work and rotating it out more frequently.

Are you trying anything new to help display student work this year? I'd love to hear about it in the comments!

Monday, August 13, 2012

Management Monday - Class Constitution

Today, I wanted to share one of my favorite first day of school activities with you as I know many of you have either started back up or will be soon. Each year, the citizens of Eberopolis take part in drafting their own class constitution. I think that it's very important for the students to feel like they have a say in creating the norms by which our class will operate, and by the time they reach 4th grade, they have enough experience with school and its expectations to have a sense for what will work and what won't. I also find that the process of writing our class constitution helps me gauge what my class will be like. One year, for example, I had a class of students who felt that reading was so important that we needed to have 30 minutes of independent reading time written into our class constitution. (I don't need to tell you how rare and awesome that class was...I also don't think they were ALL that enthusiastic about reading, but none of them dared to be the kid who spoke up against reading on that first day of school.) Most years, I get classes who propose having 30 minutes of recess instead. Either way, I get a sense of what they enjoy and what some of their priorities are.

This year, I incorporated some ideas that I'd seen on other blogs and also tried to make it fit within some of the lingo of the IB programme we use. One of the big ideas connected with our Primary Years Programme is the action cycle -- the idea that we can choose a cause or a problem to address, act in a way that addresses the issue, and then reflect on our actions and the process. This choose-act-reflect cycle can apply to pretty much anything, and this year, it applied to our constitution writing.

On the first day of school, I asked the students to divide a piece of paper into four quadrants.

Quadrant 1: Choose and describe the kind of classroom you'd like to have. Be as detailed and specific as possible.
Quadrant 2: Choose and describe the kind of teacher you'd like to have. Try to use specific words and examples, not just vague adjectives like "nice" or "fun."
Quadrant 3: Choose and describe the kind of student you'd like to be this year. What are some of your goals?
Quadrant 4: What are some specific things that could be done to make your choices possible?

After they had a few minutes to write, we moved into the "Action" stage where they were able to share some of their suggestions for how we could achieve their ideas this year. At this stage, they were just brainstorming and sharing possibilities, so we weren't really worried about writing "rules," per se.

Here's a sample of some of their suggestions:

Once I felt like everyone had some input into the process, I had the students reflect on the list (Choose-Act-Reflect) to make sure we had everything we needed and weren't leaving out something important. Originally, I'd intended to finish writing the constitution that day, but I ran out of time, so that became a good stopping point.

On day 2, we talked about some of the reflections, and then we started brainstorming ways that we could combine some of the suggestions into our class constitution. It took a bit of word-smithing, and I was pleased to see that I have some kids who are quite good with that this year. For example, when we were stuck deciding between the words "be careful of yourself and your surroundings" and "be respectful," one student thought that the word "mindful" incorporated both concepts. It was fantastic.

In the end, we drafted a fairly simple constitution that only had 3 "rules," but I was happy with the outcome.
I wrote up the final version, and each of the students signed it. It is now displayed prominently in our classroom, and we'll add "amendments" as we need them throughout the year. I think this is a good framework to start with, though, and coupled with our classroom economy, students know what is expected and that our expectations of each other are high.

How do you establish rules and expectations in your classroom? Any tips for the constitutional process? Feel free to share in the comment section. 

Friday, July 20, 2012

Friday Freebie: Self-Assessment Posters

A while back I shared this poster from my classroom:


Tonight, it reappeared on someone else's Pinterest board as I was browsing  diligently planning for the new school year, and it reminded me how much I hate the faded marker. So I made some new ones which are now available for free at my TpT store. (You can also click on the image below to get there.)


In the meantime, my classroom is really coming along! I'm so happy to have time to get organized this year. Settling in last year was such a mess...We were moving into a new school and only had 4 days to unpack and set up before the kids arrived. I was also 9 months pregnant and working in 90+ degree heat with unreliable air conditioning and elevator access for my 3rd floor classroom. It was insane! Then I was only there for 3 weeks before going on maternity leave, and by the time I got back, it was hard to make changes.

This year will be SO MUCH BETTER in that regard. I can already feel it, and I'm super excited about it.

I'll share more classroom pics next week. Have a great weekend!

Monday, June 25, 2012

Management Monday: The Origins of Eberopolis

When I did my student teaching several years ago, I worked for a full year in a second grade classroom that used a classroom economy. My mentor teacher's last name was Valentine, and when we merged our two names together, we created "Ebertine Village." This is how we referred to our class throughout the rest of the year.

When I broke off into my own classroom, I didn't have another person to teach with. It was just me all by my lonesome, so I needed to create a new name for my learning community. Eber is a short last name, so I didn't want to add "Village" or something like that onto the end as a second word. Instead, I had much grander ambitions of world domination. Hence, Eberopolis was born.

Since that year, I've taken the Eberopolis theme and ran with it in my classroom. As I described with my class jobs post last week, I try to match my job descriptions with real world jobs. All of my students earn salaries for completing those jobs, and they pay rent and taxes in my class. They also earn bonuses or pay fines according to the choices they make. Here's a poster that describes the "Financial Rights and Responsibilities in Eberopolis."

At the end of the week, we figure out how much money they have, and they can choose to either save or spend their money in our class store.

My system has evolved a lot in the last 5 years, and I've finally taken the time to put it all together in a format that can be shared with others. It took me over a week of tinkering and writing, but my Classroom Economy Megapack is now available in my Teachers Pay Teachers store. It contains several pages of detailed text about our classroom routines, set up procedures, and tips and tricks I've learned throughout the way. There are several classroom printables, posters, rewards certificates, and student and teacher-forms in the packet as well. It was quite the labor of love, and I'm really happy with how it turned out. It's over 60 pages in all.
Given how much work went into making and testing it, I'm going to be selling it for $10. But from now through Friday at noon (EST), I'll be selling it for 20% off. That's right -- over 60 pages of class economy goodness for $8.00. There's a 10 page preview over at TpT. So if you're thinking about setting up a classroom economy this year, please consider checking it out.

Tomorrow, I'll be back with another Google Sites tutorial.
See you next time!

Friday, June 22, 2012

Friday Freebie: Writer's Workshop Management

Pinterest is doing awful amazing things for my summer productivity...

Today's freebie is a bit of a DIY because I attempted to be crafty this week! Perhaps this will inspire some of you to be crafty as well.

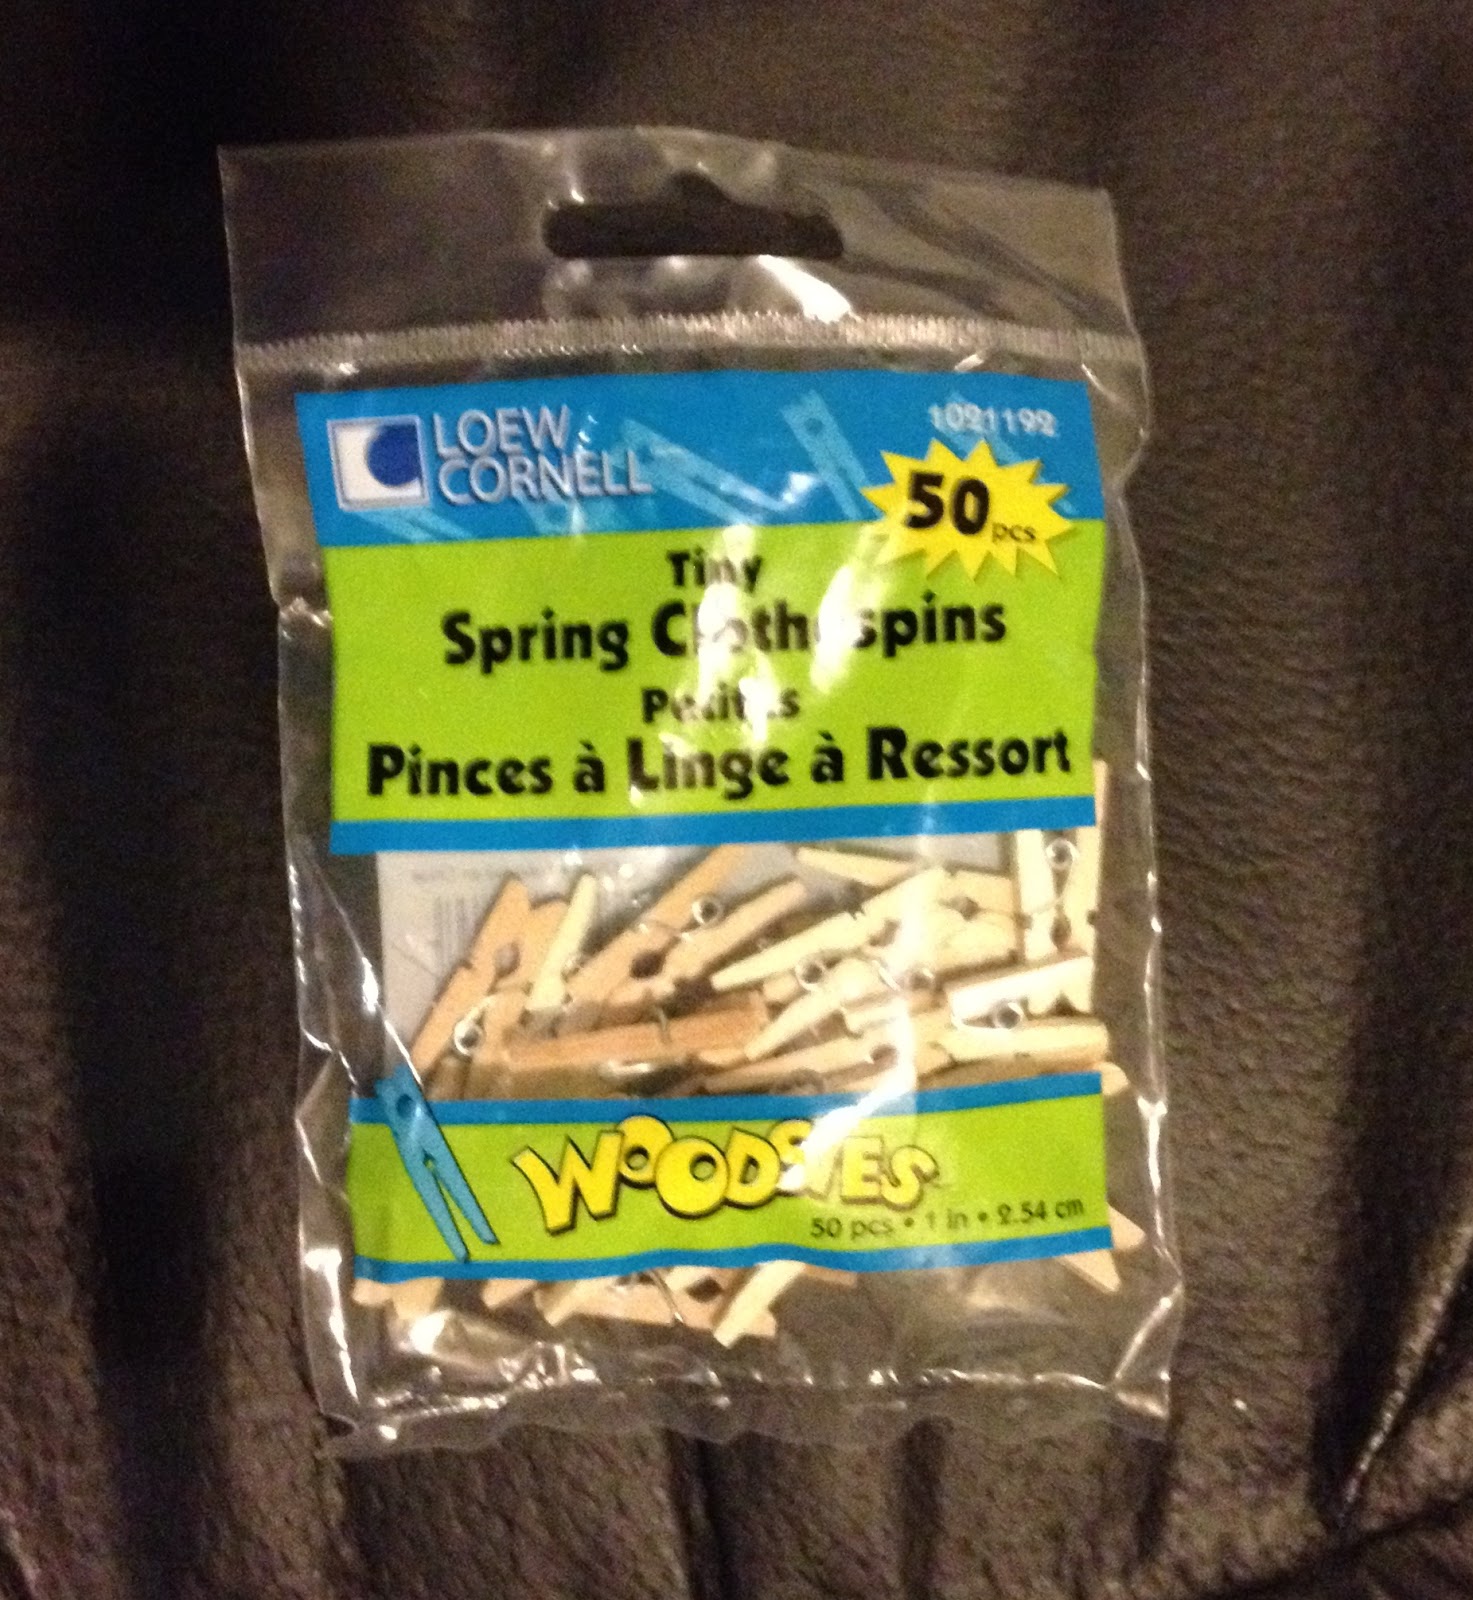
I teach writer's workshop every day in my classroom, and one of the big things that I constantly deal with is managing my students in the writing process. When I first started teaching, I made a wheel that had the different stages of the writing process on it, and the students each had clothespins to attach. I liked the wheel, but it wasn't big enough. When we started a project, for example, I'd have all of my students in the "pre-writing" stage, and there wasn't enough space to have all of the clothespins there without spilling over into another section. It was kind of a mess.

As I entered the technology age (or rather, as my classroom entered the technology age...I was already there...), I had the students show where they were in the writing process using a template on our interactive whiteboard. It worked well in theory, but usually I'd have materials from our mini-lesson that I'd want to leave projected while the students were writing, and I couldn't project that AND the writing process template. So it was back to the drawing board...

This is what I came up with...

I'm going to punch a hole in the top of "pre-writing" and hang it up in an easily accessible spot in the classroom. Overall, I'm pretty happy with how it turned out -- especially since I'm not typically very crafty! It's not too large -- about 18" x 18" and it's in the blue/green color scheme I've decided to use in my classroom this year.

Here's what you need to make your own:

To build the wheel:

To fit the pieces together:
  • Duck Tape
  • 8 Bamboo Skewers (optional -- you may find a better assembly method. I just used what was easily accessible at home...)
To keep track of students throughout the process:
  • 30 Mini Clothespins

Here are the steps I took to build my writing process wheel.
1. Trace your cake circle onto the white side of a piece of scrapbook paper. (I used 12" scrapbook paper, and I had a lot of waste since I could only use one circle per page).
2. Cut out your circle leaving about a 1" margin along the outside of the circle. This doesn't need to be exact, but you're going to want to cut a circle that's about 8" in diameter. (See picture below). Then, cut strips along the outside of the circle into the line that you traced around the cake circle to create a fringe effect. This will make it easier to wrap the scrapbook paper around the cake circle.
3. Apply a thin coat of Mod Podge to the brown/unfinished side of the cake circle and affix it to the white side of the scrapbook paper.
4. Apply a thin coat of Mod Podge along the outer inch of cake circle, and begin folding over the flaps of scrapbook paper all the way around the circle, adding more Mod Podge as necessary to keep the flaps down.
5. Allow the Mod Podge to dry completely.
6. Cut out the pieces of the Writing Process Descriptors Template to affix to the front side of the cake circles.
7. If the cake circles are completely dry, flip them over so the front side is facing you. Apply a thin coat of Mod Podge to the front side, and carefully place the Writing Process cutouts so that there is one on each cake circle. Carefully smooth out the edges and apply a small amount of additional Mod Podge to the top of the cake circle using your foam brush. (Be careful not to press down too much or use too much Mod Podge. I had some issues with it causing the color from my templates to bleed a little bit when I wasn't careful.)
8. Once you've affixed the templates to the 7 cake circles, it's time to arrange the steps of the writing process and begin fastening them all together. I used bamboo skewers and duck tape, but you may find a better process that works for you. I'm not exactly a master of crafty construction. :-) Here's how mine looked, and please remember that it's the BACK of my finished work, so no one besides you will ever really be looking at it!
9. Finally, I numbered the mini clothespins from 1 to 30, and clipped them to the pre-writing stage. Once I'm able to move it back into my classroom, I'll also punch a hole in the top and hang it from a ring beneath one of my bulletin boards.
So there you have it! One of my most recent attempts at craftiness! To get your copy of the FREE Writing Process descriptors, visit my TpT store. And while you're there, you might want to check out my Colorful Class Schedule Cards that I'll be using this year. (I report back in a little over a month, y'all. Can you believe that?!? I'll have kiddos in my room on August 1! Lots to prepare and share between now and then!)

What projects are you working on or hoping to work on for your classroom? I'd love to hear about it in the comments!

Have a great Friday!

Related Posts Plugin for WordPress, Blogger...