Showing posts with label writer's workshop. Show all posts

Friday, October 11, 2013

Are You Ready for NaNoWriMo?

I plan to encourage my students to participate in NaNoWriMo again this year. For those of you who aren't familiar, November is National Novel Writing Month, or NaNoWriMo for short. It's the month where tell your inner-editor to hush so you can just let the ideas flow on to the page. It's about getting something done without worrying how perfect it is, because you can always go back and revise in December.


Last year, as October drew to a close, I introduced NaNoWriMo to my class. I explained the premise, and gave them the option of taking on the challenge. We talked about word count goals and commitment to writing outside of the classroom. Then the fun started. Student after student signed up, each cheering each other on as they dedicated themselves to writing a book. In the end, I think all but two students decided to participate. We had weekly lunch meetings where students could eat and share their writing with friends, and although not all students met their goals, they definitely started to find their voices as authors.

The Young Writers Program for NaNoWriMo has some great teaching materials to get your students psyched for NaNoWriMo and to teach them about narrative writing in general. You can check out their website at http://ywp.nanowrimo.org/. In addition, there's still time to order a NaNoWriMo classroom kit which comes with a student goal setting poster, NaNoWriMo stickers to track progress toward a goal, and buttons for those students who participate or finish. The classroom kit is free (and awesome), but they request a $10 donation for the materials -- a small price to pay to get your students excited about writing.

In honor of NaNoWriMo, I'll be hosting a month-long link-up that will start on November 1 and run the duration of NaNoWriMo. Whether your class officially participates in NaNoWriMo or not, I hope you'll join me in sharing the great writing work that's happening in your class. Grab the button, spread the word, and meet me back here on November 1st for a writing extravaganza!


In the meantime, check out the Educators' section of the Young Writers Project. I'm sure you'll find plenty to get you (and your students) excited for a month full of creative writing!

Who's in?

Thursday, October 10, 2013

The Best Text for Teaching How to Write and Revise Leads

My fourth graders hate revision. They're often offended by the mere suggestion that they hadn't nailed the perfect lead to their stories in their first draft.

I'm used to this. I see it every year in writer's workshop, especially at the beginning of the year when we're writing in a genre for the first time.

And every time I see this, I become more determined to break them of this thinking.

Today, we were working on the Common Core State Standard W.4.3a - Orient the reader by establishing a situation and introducing a narrator and/or characters; organize an event sequence that unfolds naturally.

My favorite story to use for this is standard -- especially with fourth graders -- is The Teacher's Funeral by Richard Peck.


This book, set in a small Indiana town with a one-room schoolhouse, has the best opening line of a children's book ever.

If your teacher has to die, August isn't a bad time of year for it. 

Richard Peck keeps it going from there, building an incredible introduction. You can read the entire first chapter here.

Today, I started our writing lesson by reading this chapter to them. I have the Kindle edition of the book, so when I read it, I can project it on our ActivBoard so the students can follow along as I read. They laughed throughout the intro and were immediately hooked, begging me to choose this as our next chapter book read-aloud. Score one for the objective of "hooking your readers!"

I then asked them how many of them thought that introduction was the one that was in the first draft of his book.

One or two hands went up.

Richard Peck shared in an article called "In the Beginning" (Horn Book Magazine, September 2006, pp. 505-508) that it normally takes him 24 drafts of his lead before he's happy with it. TWENTY-FOUR!

And here I'm asking my students to take a second pass at their writing.

I shared that little nugget with my students before we reread the first chapter. As we read if for a second time, we focused on the characteristics of his writing that made it such a great lead.

Here's what my students noticed, compiled into an anchor chart:


Once we finished the chart, I had them go back to a piece of writing they've been working on and try to write a different introduction. Some students tried changing the point of view, others jumped into the action or started with dialogue. Whatever the strategy, all of them managed to produce a new version of their introduction, and all were at least a little better than what they'd started with.

We'll get this revising thing down eventually...

What are some of your favorite books to use to teach students how to hook their readers? I'd love to hear about them in the comments!

Tuesday, June 4, 2013

The Secret Knowledge of Fourth Graders

As I was reminded in reading all of the June Currently's, not everyone is on summer vacation yet. So for those of you who are not yet enjoying time off, I wanted to share a fun creative writing activity that works well for the end of the year.

One of my favorite books to share with students is The Secret Knowledge of Grown-Ups by David Wisniewski.


In this highly-entertaining book, Wisniewski takes several "rules" that children often hear -- like "eat your vegetables" -- and explains the real reason that rule exists. For example, we don't eat our vegetables because they make us healthy. The real reason we eat them is to stop them from rising up and taking over the world! Or, we don't brush our hair to help us look neat, we do it to stop the hair from growing back into our heads and crowding out our brains. The book is filled with hilarious examples and colorful illustrations that my students loved.

I read excerpts from this book over the course of a couple days, and several of my students looked at it in their free-time. We then set out to write our own examples for a class book entitled "The Secret Knowledge of Fourth Graders."

Here are some of the "rules" students wrote about:
  • Why you need to read "Just Right Books"
  • Why we use number 2 pencils on tests
  • Why you can only check out 2 books from the library at a time
  • Why we take AR tests
  • Why it's important not to be tardy
  • Why we return library books on time
  • Why we have homework
  • Why we use pencils instead of pens
  • Why we don't bend the pages of a book
  • Why we stack chairs at the end of the day
  • Why we take standardized tests
The creativity in the "real" reasons why we do these things was fantastic. Here's an example from one of my students:


We wrote our final drafts on our iPads in Pages using the Visual Report template. That helped tremendously with the formatting.

I'm planning to share several of these examples with my students next year, and I will definitely do this activity again. My students enjoyed it so much that several of them were talking about making other "spin-off" books such as The Secret Knowledge of Minecraft Players or The Secret Knowledge of Readers. I'm sorry that I didn't get to see how those turned out as well.

If you've never read The Secret Knowledge of Grown-Ups, I highly recommend it. It's great for sparking creative writing ideas, and it can provide a fun writing activity in the late stages of the year.

What are some other school rules you can envision your students writing about? I'd love to hear your ideas in the comments!

Friday, June 22, 2012

Friday Freebie: Writer's Workshop Management

Pinterest is doing awful amazing things for my summer productivity...

Today's freebie is a bit of a DIY because I attempted to be crafty this week! Perhaps this will inspire some of you to be crafty as well.

I teach writer's workshop every day in my classroom, and one of the big things that I constantly deal with is managing my students in the writing process. When I first started teaching, I made a wheel that had the different stages of the writing process on it, and the students each had clothespins to attach. I liked the wheel, but it wasn't big enough. When we started a project, for example, I'd have all of my students in the "pre-writing" stage, and there wasn't enough space to have all of the clothespins there without spilling over into another section. It was kind of a mess.

As I entered the technology age (or rather, as my classroom entered the technology age...I was already there...), I had the students show where they were in the writing process using a template on our interactive whiteboard. It worked well in theory, but usually I'd have materials from our mini-lesson that I'd want to leave projected while the students were writing, and I couldn't project that AND the writing process template. So it was back to the drawing board...

This is what I came up with...

I'm going to punch a hole in the top of "pre-writing" and hang it up in an easily accessible spot in the classroom. Overall, I'm pretty happy with how it turned out -- especially since I'm not typically very crafty! It's not too large -- about 18" x 18" and it's in the blue/green color scheme I've decided to use in my classroom this year.

Here's what you need to make your own:

To build the wheel:

To fit the pieces together:
  • Duck Tape
  • 8 Bamboo Skewers (optional -- you may find a better assembly method. I just used what was easily accessible at home...)
To keep track of students throughout the process:
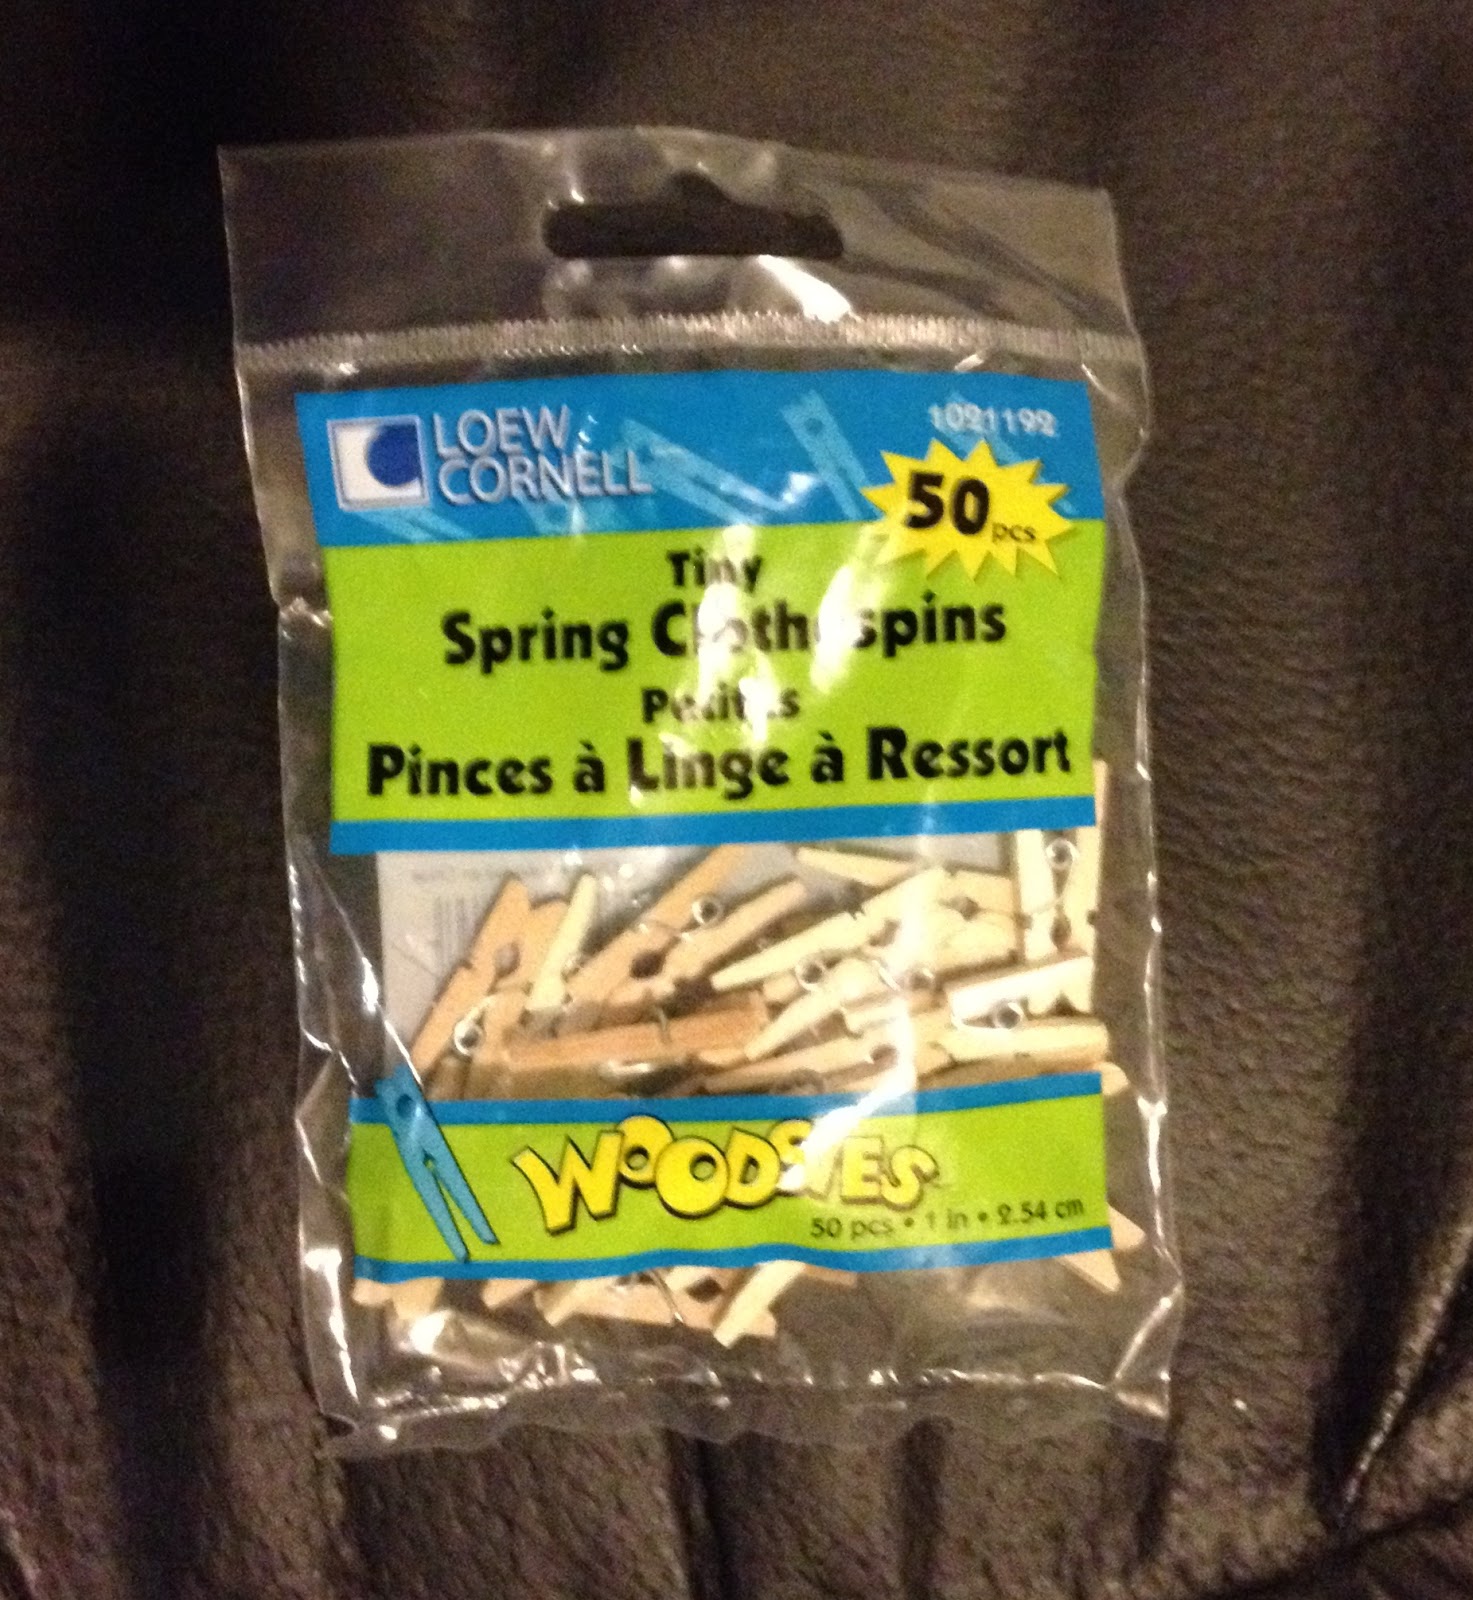
  • 30 Mini Clothespins

Here are the steps I took to build my writing process wheel.
1. Trace your cake circle onto the white side of a piece of scrapbook paper. (I used 12" scrapbook paper, and I had a lot of waste since I could only use one circle per page).
2. Cut out your circle leaving about a 1" margin along the outside of the circle. This doesn't need to be exact, but you're going to want to cut a circle that's about 8" in diameter. (See picture below). Then, cut strips along the outside of the circle into the line that you traced around the cake circle to create a fringe effect. This will make it easier to wrap the scrapbook paper around the cake circle.
3. Apply a thin coat of Mod Podge to the brown/unfinished side of the cake circle and affix it to the white side of the scrapbook paper.
4. Apply a thin coat of Mod Podge along the outer inch of cake circle, and begin folding over the flaps of scrapbook paper all the way around the circle, adding more Mod Podge as necessary to keep the flaps down.
5. Allow the Mod Podge to dry completely.
6. Cut out the pieces of the Writing Process Descriptors Template to affix to the front side of the cake circles.
7. If the cake circles are completely dry, flip them over so the front side is facing you. Apply a thin coat of Mod Podge to the front side, and carefully place the Writing Process cutouts so that there is one on each cake circle. Carefully smooth out the edges and apply a small amount of additional Mod Podge to the top of the cake circle using your foam brush. (Be careful not to press down too much or use too much Mod Podge. I had some issues with it causing the color from my templates to bleed a little bit when I wasn't careful.)
8. Once you've affixed the templates to the 7 cake circles, it's time to arrange the steps of the writing process and begin fastening them all together. I used bamboo skewers and duck tape, but you may find a better process that works for you. I'm not exactly a master of crafty construction. :-) Here's how mine looked, and please remember that it's the BACK of my finished work, so no one besides you will ever really be looking at it!
9. Finally, I numbered the mini clothespins from 1 to 30, and clipped them to the pre-writing stage. Once I'm able to move it back into my classroom, I'll also punch a hole in the top and hang it from a ring beneath one of my bulletin boards.
So there you have it! One of my most recent attempts at craftiness! To get your copy of the FREE Writing Process descriptors, visit my TpT store. And while you're there, you might want to check out my Colorful Class Schedule Cards that I'll be using this year. (I report back in a little over a month, y'all. Can you believe that?!? I'll have kiddos in my room on August 1! Lots to prepare and share between now and then!)

What projects are you working on or hoping to work on for your classroom? I'd love to hear about it in the comments!

Have a great Friday!

Friday, April 27, 2012

Tutorial - Build a Conferring Notebook with Evernote

The week of standardized testing and my sinus infection proved to be an exhausting combination that sapped all of my blogging strength. It's finally the weekend, though, so I'm back. Hooray!!!

Today I want to share a tip for building a conferring notebook for any subject -- especially reader's and writer's workshop.


Perhaps one of my very favorite tools to use for keeping track of things is Evernote. It's a free service that you can use to organize notes, pictures, and web clippings, and it works on any device -- laptops, iPads, smartphones, etc. It also recognizes text in pictures, and can search for that text. In my personal life, that feature comes in handy when I want to snap pictures of the label on a bottle of wine worth trying again or the hair dye color I'll need for doing touchups in a few weeks. But in my classroom, I like to use it for my conferring notebook.

This tutorial will help you get started with setting up your own conferring notebook in Evernote. All you'll need is an email address.

After you register, you'll need to check your email for a confirmation code to complete the registration process, but once you have that, you'll be ready to sign in and get going!

Underneath the elephant trunk in the upper left of the screen is a list of all of your notebooks. When you first get started, you'll have a default notebook that is your user name's notebook. I like to create special notebooks for the different subjects, however, so today I'll build a notebook for Writer's Workshop by clicking the down arrow by "Notebooks" and choosing "New Notebook." I'll give it a name (Writer's Workshop) and save it.

Once the notebook is created, I can make it my default notebook (the first notebook that launches when I open Evernote and the place where new notes get saved). You can do this by hovering your mouse over the notebook's name and clicking on the arrow beside it, then choose properties. You'll know which one is your default because it will have a star beside it. 

The next step is to make a new note. Typically, I create a new note for each student. 
(Note: I'd show you my real conferring notebook on Evernote, but it's got lots of student info in it that obviously can't be shared online. You'd mostly be looking at a blur. I'll revisit this topic as it gets closer to the next school year, though, and share more tips as I clear out this year's class.)

In the actual entries, I'll type the date and a brief note about what we conferred about. It automatically saves as I go, and I can set it to sort my files by the last updated date. This is useful so I can keep track of the kids that I haven't conferred with in a while. I can also take pictures and drag and drop them into notes. This is helpful if I want to take an image of a student's writing or a book he or she is working on reading. You can also send emails to your Evernote account and specify what notebook it should be filed in. 

The real advantage of Evernote is its portability. In the past, I've never really had a notebook system that worked for me. I couldn't keep up with all of my papers and artifacts, or I'd forget to bring it home with me over the weekend to plan instruction for the week ahead. Evernote works on any device and automatically syncs, so I can access my notebook anytime, anywhere. It's perfect for me as I circulate throughout the classroom, because I can use it on my phone or iPad -- items I'm likely to have on or near me anyway. If you're looking for a new system to use next year, I would highly recommend that you give this a try!

What do you use to record your conference notes? Do you use Evernote? Feel free to share your experiences in the comments below!


Wednesday, April 18, 2012

Wednesday Writing: Keynote

One of my favorite things about the new Common Core English Language Arts standards is the range of writing standards (W.10). What it basically says is that students will be expected to develop writing fluency; that is, they'll be able to write in many different contexts and subjects, for different audiences, purposes, and effects, and with long and short pieces. I love to teach writing, so I'm excited that it will finally be emphasized more broadly.

This year, one of my favorite apps to use with my students for short writing pieces has been Keynote. Traditionally, I thought of Keynote as the Mac equivalent to PowerPoint, and it can certainly serve that purpose. But Keynote can also be a good tool to use when you want students to write a very short piece or synthesize information and maybe incorporate a picture or two.

A couple of weeks ago in Social Studies, we were studying the invention of the telegraph and how it impacted society. We read a few different articles about it, and then I asked students to synthesize the information by creating an award for the telegraph. They had to create one slide using both pictures and text that said, for example, "Award for Best Communication Device of the 1800s" or something like that. They then had to describe why the telegraph was deserving of that award, and I let them include a message in Morse Code at the end. Here are a couple of examples:

I love how they connect the invention to emailing. I'm sure the concept makes more sense to them that way, but it's funny because there were so many inventions and innovations that had to happen after the invention of the telegraph before we could get to email. But alas...

This project took less than an hour from start to finish, and that includes the time it took to read the articles. We frequently use Keynote for these one-page type projects, so the students are very knowledgeable in how to use the app. 

This is just one example of how we use Keynote to build writing into our daily routines. What kinds of writing have you been doing in the classroom lately? Please share in the comments section!

Wednesday, April 11, 2012

Wednesday Writing: KidBlogs

Last year, I discovered the wonderful educational blogging site KidBlog. It is a completely free, user-friendly, and secure site that students can use for writing.


Blogging with students can be an exciting, yet challenging experience because it involves writing for an online audience. In the past, when students have published their writing in Writer's Workshop, they've had moments to sit in the author's chair and read aloud their published pieces. They could inject meaning through the way that they read their work or fill in random missing words as they were reading aloud. Blogs are really different, however, because you're putting your work "out there" for others to read, and your written words have to speak for themselves. It really increases the demand on student writers, and it shows in the quality. 

This year, I've had my students use KidBlog to write four book reviews. I also have them comment on the blogs by other students in our class. I moderate both the posts and the comments so I'm able to see exactly what the kids are saying. I also participate in the conversations through my own comments. Currently, all of the settings are protected so that only my students and I can see the blog posts, but I'll be sharing some of the content and routines we use with you in future posts. In the meantime, if you are interested in getting started with having your students blog, or if you just want to improve the process, I would very highly recommend checking out Langwitches Blog. Silvia has an amazing collection of resources for integrating technology in the classroom, and she has an entire unit developed on student blogging. 

Do you blog with students in your classroom? If so, how do you use blogs? If not, what are the biggest obstacles or challenges that you anticipate with using student blogs? Feel free to sound off in the comments.

Monday, November 30, 2009

Professional Learning

I can't remember if I've mentioned it already, but I'm taking this year off from teaching to pursue a master's degree full-time in curriculum and instruction. This is the time of the semester when all of my major projects are starting to be due. Here's what I'm working on:

1. An article on working with gifted readers that I'm going to try to get published. It seems as though gifted students are quite neglected in the education system these days between NCLB, a shortage of funding, and inadequate teacher training. Recent reports from the Fordham Foundation and NAGC reveal that the needs of our nation's brightest students aren't being met. I'm researching specific considerations to take into account when teaching reading to these students in the regular classroom. It's shocking how little has been written about the topic relative to other issues in reading.

2. An action plan for building teacher-driven study groups for professional learning in schools. It's the major project for my course on shared leadership between teachers and administrators.

3. A case study of two readers that I worked with for a few days last month. The emphasis is on reading comprehension generally and identifying the main idea specifically.

4. A paper on the role of expectations in "good teaching." I'm also updating my website as a companion piece to show my ideas in practice.

5. A self-evaluation and action plan for becoming a better reading teacher.

6. A plan for my "Instructional Dream" for integrating technology in my classroom. I'm going to write about the potential for using Google Wave in writer's workshop. I got my invitation last week, and while I'm still trying to get the hang of it, I'm blown away by its potential as a collaborative learning tool in the classroom.

So that's what I've been up to lately. As I finish these projects, I'll be happy to share any useful resources and findings.
Related Posts Plugin for WordPress, Blogger...