Showing posts with label freebies. Show all posts

Saturday, January 5, 2013

Busy Weekend & Bathroom Break Freebie

I feel like my two days with students last week were really just a warm-up to what comes next. Monday will start our first real week of the new term, and that's when I'm planning to implement some new strategies and policies in the classroom. I'm thinking about revamping a lot of what I do in my reading and writing block (more on that later), but I'm also going to be cracking down more on students who abuse privileges. For example, we have several scheduled bathroom breaks throughout the day: before school (we start at 7:45), between reading & math at 9:30, before recess at 11:40, after lunch at 12:30, and if needed, right before dismissal at 2:30. Despite these opportunities, I still have students who ask to go multiple times throughout the day. They always insist that it's an "emergency," and while I'm highly skeptical that we share the same definition of that term, I've seen too many accidents among fourth graders over the last couple years to question it. Surely, though, the students are taking advantage of my relaxed policy, and some of them are missing out on valuable instructional time because of it.

I recently saw Stephanie's post over at Teaching in Room 6 about Managing the Bathroom, and it was a real flash of genius. I, too, have a classroom economy in place, and the idea of selling the students additional bathroom passes seemed like a brilliant idea. I know many of my students will buy them just in case, and it will definitely curtail some of my frequent bathroom/water fountain visitors. (If students have a genuine medical issue, this policy won't apply to them.)

I introduced the item before opening my class store yesterday, and not surprisingly, it was met with some controversy. My frequent bathroom-goers were outraged that I would make them buy a pass, but many of my other students spoke up in defense of the policy. In the end, the nay-sayers gave in, and several orders for bathroom passes were placed once the students started shopping.

I wasn't quite on my game enough to make and order the bathroom passes through VistaPrint like Stephanie did, so I made my own this morning, and I'm sharing them as a freebie. Click the image below (or click here) to get the passes from my Google Drive.


In other developments, I think the rest of this weekend is going to be spent getting organized for this term. I'm starting several new units, and I really want to map it all out and plan as much as I can so that I'm not rushing around doing everything at the last minute. I also have lots of thank you cards to write because my class spoiled me tremendously before the break.

What new policies or routines are you excited about implementing this year?

Friday, July 20, 2012

Friday Freebie: Self-Assessment Posters

A while back I shared this poster from my classroom:


Tonight, it reappeared on someone else's Pinterest board as I was browsing  diligently planning for the new school year, and it reminded me how much I hate the faded marker. So I made some new ones which are now available for free at my TpT store. (You can also click on the image below to get there.)


In the meantime, my classroom is really coming along! I'm so happy to have time to get organized this year. Settling in last year was such a mess...We were moving into a new school and only had 4 days to unpack and set up before the kids arrived. I was also 9 months pregnant and working in 90+ degree heat with unreliable air conditioning and elevator access for my 3rd floor classroom. It was insane! Then I was only there for 3 weeks before going on maternity leave, and by the time I got back, it was hard to make changes.

This year will be SO MUCH BETTER in that regard. I can already feel it, and I'm super excited about it.

I'll share more classroom pics next week. Have a great weekend!

Friday, July 6, 2012

Friday Freebie - Interactive Word Wall Cards

I report back to school in about two weeks. Yes, you read that correctly...TWO WEEKS, people! Technically teachers have to be there on the 25th, but that's a Wednesday, and you know how it goes. Pre-planning isn't really for much of planning. It's for sitting through meetings, catching up with colleagues you haven't seen all summer, tracking down the garbage can that mysteriously vanished from your classroom when the room was cleaned...You know how it goes. So, I expect that I'll be there before the 25th, trying to get my room in some semblance of order while I still have the time to do so.

And while I haven't done anywhere near as much lesson planning this summer as I'd set out to do, my room is going to be cute this year, gosh darnit! Thank you, Pinterest... At least, I hope it is given how much time I've spent putting together new things to hang up in my classroom.

Today's addition to the classroom decor is my set of math vocabulary words for my interactive word wall.

The idea started when I had my students write geometry riddles based on the properties of different shapes and then attach the solutions on a QR code. My kids loved that, and I'd frequently find them wandering over to the display with their iPads to read the riddles and check the solutions. I figured if they were interested in working with that display, maybe they'd be interested in having an interactive word wall, too.

Thus, I set to work on making a set. I scoured the CCSS and various other curriculum docs to try to come up with a vocabulary list, and I found about 125 different terms for fourth grade. I was able to match most of them up with kid-friendly definitions and tutorials at the website Math is Fun. I turned those into QR codes, and voila -- my interactive word wall was born.

I decided to share the "Property" cards as my freebie today because a) those show up in many of the upper grade standards -- not just 4th grade, and b) I need help remembering which is which each year, so I know these could probably be helpful for a lot of students (and their teachers!). To get your copy, you can click on the image above, or click here. The definitions include the various properties for both multiplication and addition where applicable.

I'm selling the complete set of 4th grade cards over at my Teachers Pay Teachers store, and I'm hoping to put together a set for 5th grade and maybe 3rd as well. I'm getting ready to head out on vacation in the next few days, however, so I make guarantees that they'll be done before I leave. I'm also thinking about making some for other subject areas as well -- I'm pretty excited about the possibilities.

Have a great weekend! Another tech tutorial will be coming soon!

Friday, June 22, 2012

Friday Freebie: Writer's Workshop Management

Pinterest is doing awful amazing things for my summer productivity...

Today's freebie is a bit of a DIY because I attempted to be crafty this week! Perhaps this will inspire some of you to be crafty as well.

I teach writer's workshop every day in my classroom, and one of the big things that I constantly deal with is managing my students in the writing process. When I first started teaching, I made a wheel that had the different stages of the writing process on it, and the students each had clothespins to attach. I liked the wheel, but it wasn't big enough. When we started a project, for example, I'd have all of my students in the "pre-writing" stage, and there wasn't enough space to have all of the clothespins there without spilling over into another section. It was kind of a mess.

As I entered the technology age (or rather, as my classroom entered the technology age...I was already there...), I had the students show where they were in the writing process using a template on our interactive whiteboard. It worked well in theory, but usually I'd have materials from our mini-lesson that I'd want to leave projected while the students were writing, and I couldn't project that AND the writing process template. So it was back to the drawing board...

This is what I came up with...

I'm going to punch a hole in the top of "pre-writing" and hang it up in an easily accessible spot in the classroom. Overall, I'm pretty happy with how it turned out -- especially since I'm not typically very crafty! It's not too large -- about 18" x 18" and it's in the blue/green color scheme I've decided to use in my classroom this year.

Here's what you need to make your own:

To build the wheel:

To fit the pieces together:
  • Duck Tape
  • 8 Bamboo Skewers (optional -- you may find a better assembly method. I just used what was easily accessible at home...)
To keep track of students throughout the process:
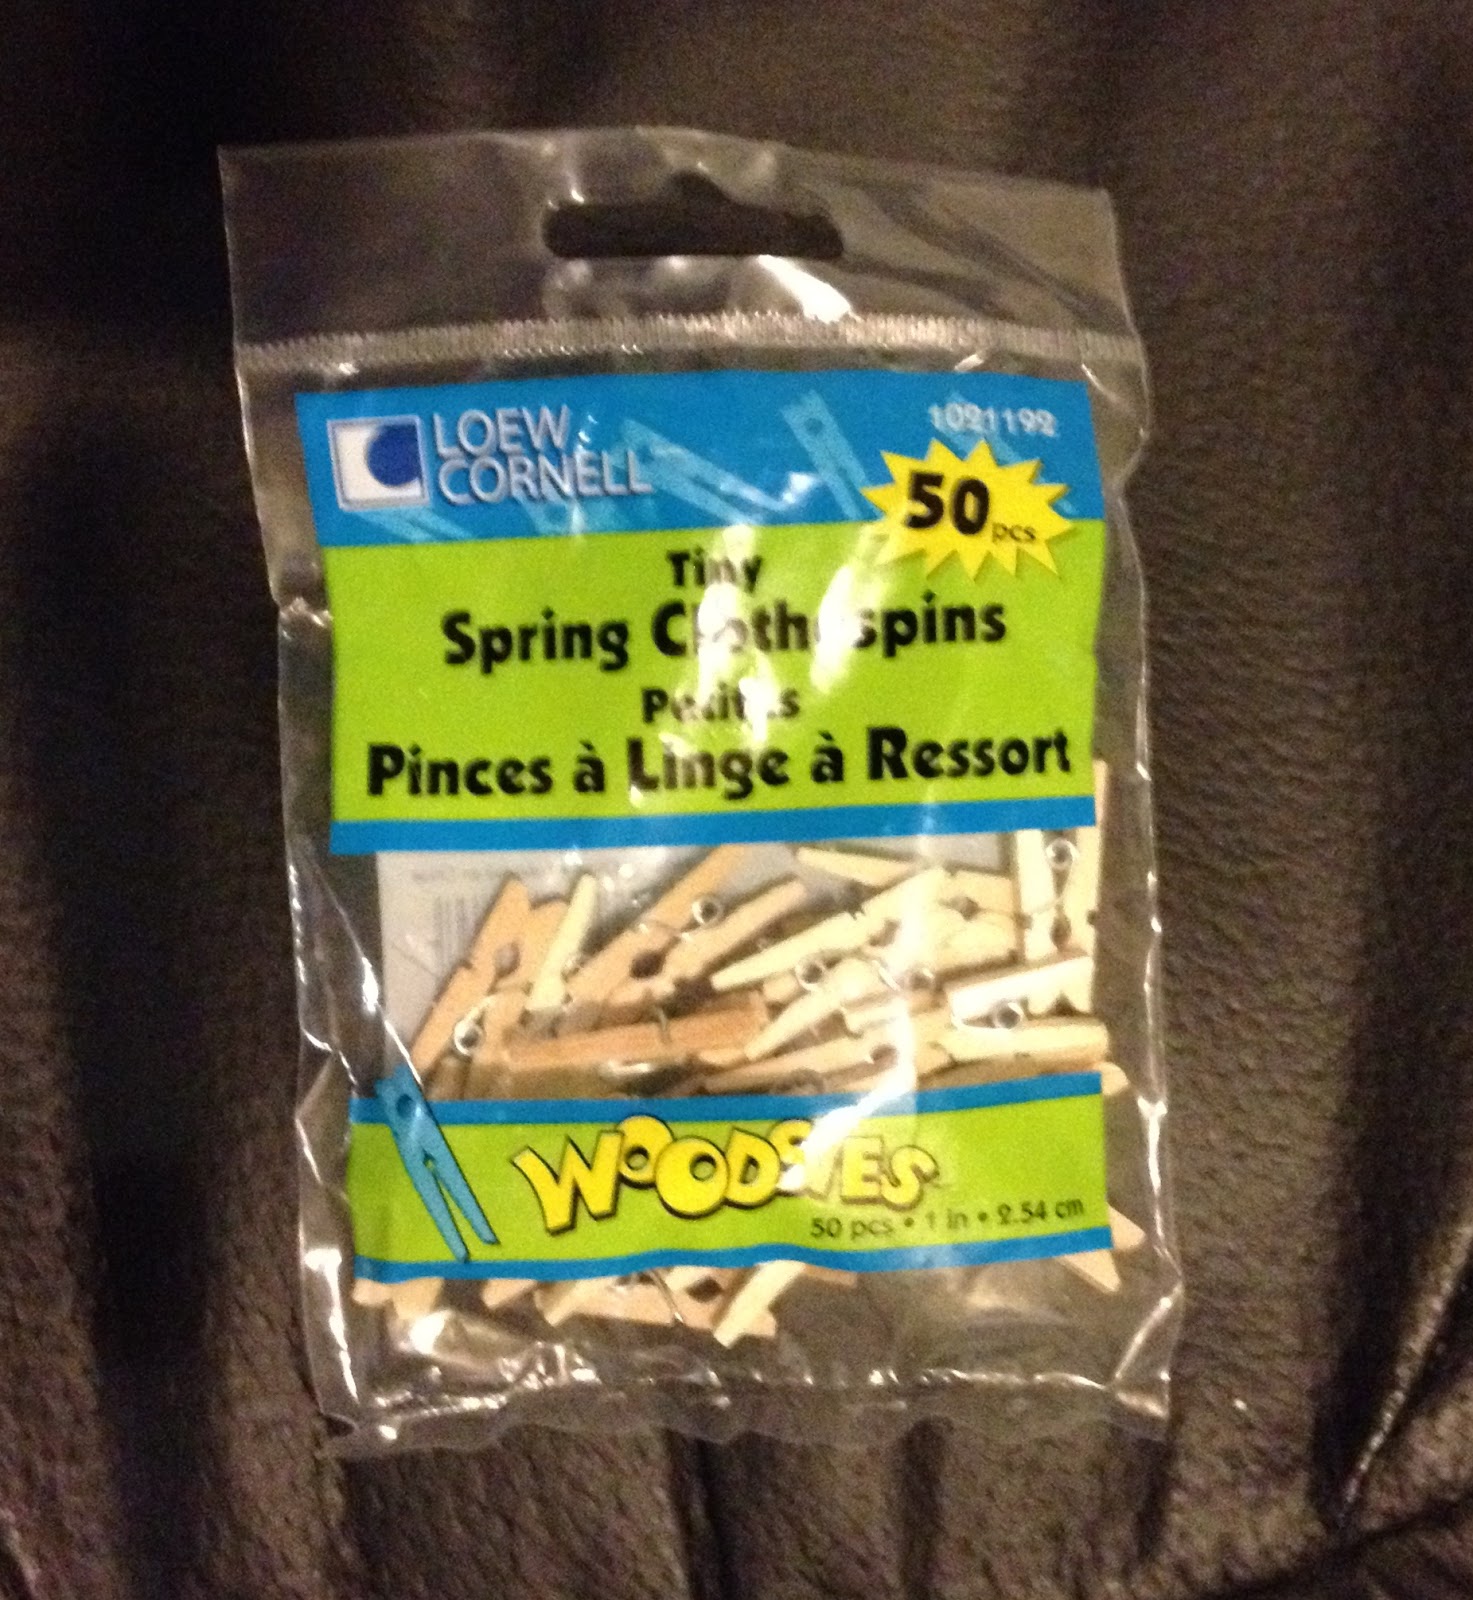
  • 30 Mini Clothespins

Here are the steps I took to build my writing process wheel.
1. Trace your cake circle onto the white side of a piece of scrapbook paper. (I used 12" scrapbook paper, and I had a lot of waste since I could only use one circle per page).
2. Cut out your circle leaving about a 1" margin along the outside of the circle. This doesn't need to be exact, but you're going to want to cut a circle that's about 8" in diameter. (See picture below). Then, cut strips along the outside of the circle into the line that you traced around the cake circle to create a fringe effect. This will make it easier to wrap the scrapbook paper around the cake circle.
3. Apply a thin coat of Mod Podge to the brown/unfinished side of the cake circle and affix it to the white side of the scrapbook paper.
4. Apply a thin coat of Mod Podge along the outer inch of cake circle, and begin folding over the flaps of scrapbook paper all the way around the circle, adding more Mod Podge as necessary to keep the flaps down.
5. Allow the Mod Podge to dry completely.
6. Cut out the pieces of the Writing Process Descriptors Template to affix to the front side of the cake circles.
7. If the cake circles are completely dry, flip them over so the front side is facing you. Apply a thin coat of Mod Podge to the front side, and carefully place the Writing Process cutouts so that there is one on each cake circle. Carefully smooth out the edges and apply a small amount of additional Mod Podge to the top of the cake circle using your foam brush. (Be careful not to press down too much or use too much Mod Podge. I had some issues with it causing the color from my templates to bleed a little bit when I wasn't careful.)
8. Once you've affixed the templates to the 7 cake circles, it's time to arrange the steps of the writing process and begin fastening them all together. I used bamboo skewers and duck tape, but you may find a better process that works for you. I'm not exactly a master of crafty construction. :-) Here's how mine looked, and please remember that it's the BACK of my finished work, so no one besides you will ever really be looking at it!
9. Finally, I numbered the mini clothespins from 1 to 30, and clipped them to the pre-writing stage. Once I'm able to move it back into my classroom, I'll also punch a hole in the top and hang it from a ring beneath one of my bulletin boards.
So there you have it! One of my most recent attempts at craftiness! To get your copy of the FREE Writing Process descriptors, visit my TpT store. And while you're there, you might want to check out my Colorful Class Schedule Cards that I'll be using this year. (I report back in a little over a month, y'all. Can you believe that?!? I'll have kiddos in my room on August 1! Lots to prepare and share between now and then!)

What projects are you working on or hoping to work on for your classroom? I'd love to hear about it in the comments!

Have a great Friday!

Monday, April 23, 2012

Management & Mentoring Monday: Yes, No, and Sort Of

This will be a relatively quick post because it's late, I'm sick, and it's testing week. Blah.

One of the most brilliant things I ever saw for grading assignments came from one of my mentors, Nell Duke, at Michigan State. What she did was outline 3-5 different objectives that you needed to accomplish in an assignment, and she would phrase them as a question, "Did you...?". When it was time for her to grade the assignment, she'd answer the question with either a "yes," "no," or "sort of." If the answer was "yes," you'd get 2 points. A "sort of" was worth 1 point, and a "no" was worth 0 points.

Grading using this system is amazingly easy once you know what criteria you're going to use, and it helps students know exactly what is expected of them for the assignment.

Here's a free example of a "Yes, No, Sort of" checklist that I used with my students when they were writing book reviews of fiction books on KidBlog.


I know it's not glamorous, but it's free. :)  You can access it by clicking on the image above or clicking here.

In this example, I wanted it to add up to 35 points possible, so I weighted one category higher than the others. In some cases, there wasn't an opportunity to get a "sort of" -- either you turned it in on time, or you didn't, for example. So those were all or nothing point-wise.

We've moved to a different grading system this year, but I still like this way of communicating expectations and assessing student work fairly quickly.

Are there any tools you use in the classroom to make your grading more efficient? Feel free to share your strategies in the comment section below!


Until next time,

Friday, April 20, 2012

Friday Freebie: Reading Informational Checklist

Last week, I shared a 4th grade CCELA checklist that can be used with individual students to assess their progress toward the Reading Literature Standards. This week, I'm continuing the checklists for Reading Informational. You can download your copy by clicking on the image below:


I hope this is helpful to all of you 4th grade teachers out there! Have a great weekend!

Friday, April 13, 2012

Friday Freebie: Common Core Assessment Checklist

I use checklists a lot. They help me see what I need to teach and where students still need some help. Sometimes I will make checklists that assess the class as a whole, and other times, I will use a separate checklist for each child.

I like to break it down into three categories:

Yes - the student shows evidence of mastery
Sort of - the student is close to mastery but still needs a bit of help, or
Not yet - the student is not yet able to master this standard

I've started to work on some assessment checklists for next year with the Common Core ELA Standards for 4th grade, and I wanted to share the one that I've made for Reading Literature.

https://docs.google.com/open?id=0B8y-ZrUhAbCnc05MZ0tUS01SeDJuU0NwU2hYR1B0Zw

Click on the image above to get your checklist.

Do you use checklists? What are some of the ways you use checklists to help you in the classroom? Share your thoughts in the comments section.

Happy Friday!

Related Posts Plugin for WordPress, Blogger...