I'm continuing my summer book study of When Writing with Technology Matters by Carol Bedard and Charles Fuhrken, and I was blown away by Part 1 of this book.
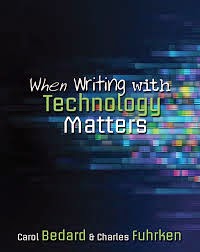
Part 1 describes a project of reading and writing to launch moviemaking. It is a great example of incorporating authentic reading and writing tasks in the classroom, and it is definitely the type of project that is enhanced through technology integration. I've broken down the contents of this section into 10 steps for you to use in your own classroom projects.
Step 1: Choose books for reading groups
This project functionally starts with literature circles. Students are offered 4-6 book titles to choose from that reflect a variety of genres and themes. Bedard and Fuhrken point out a few considerations that are particularly insightful:
- Fantasy promotes more creativity in the movie making
- Realistic fiction will be more relatable
- Historical fiction facilitates research skills
- Protagonists should be similar in age to students
- Open-ended texts can be adapted into sequels while interesting main characters support prequels
Action step:
( ) Create a WebQuest that includes author websites and book review sites about each of the candidate books. This will allow students to make a good decision about which book is the best fit.
Step 2: Set up Student Blogs for facilitating book discussions
Blogs allow students to engage in deeper discussions about their books and practice writing about texts. As a teacher, you can facilitate this by offering open-ended questions to guide student responses. Later, as students become more comfortable with the platform, you can model appropriate blogging behavior by leaving comments on students’ posts. Eventually, as students become more versed with the logistics of blogging, you can take more of a hands-off approach with limited interventions so the students can discuss the books independently.
Action step:
( ) Choose a blogging platform to use with students. One I recommend is KidBlog, which I’ve written about in the past.
Step 3: Adapt the book into a screenplay.
Once students have finished reading the book, they should consider ways to adapt the book into a screenplay. In order to make sure the writing engages the students creatively, they should modify the story in some way. This would be an example of the types of creative reading often associated with fan-fiction. A downloadable poster of possibilities is below.

At this stage, students are working independently on their writing, taking the stories down different avenues according to their interests. It’s not necessary to complete the writing cycle at this stage—they merely need a workable rough draft.
Action step:
( ) Give students time to write their story ideas for a screenplay. At this stage, it can remain a narrative and doesn’t need to be formatted into a script.
Step 4: Develop the pitch.
Screenwriters pitch their story ideas to studios all the time, making this an authentic part of the moviemaking process. Rather than simply reading their screenplay to the class, the authors describe 3 key components of a good pitch:
* It grabs the audience’s attention through a hook or a teaser.
* It summarizes the story and identifies the genre without giving away everything.
* It’s delivered with high energy and excitement.
A complete mini-lesson on giving a pitch is featured in the appendices of the book.
Once students have developed and practiced their pitches, they’ll want to deliver them to their classmates to determine which movies will be made. You could have the class vote on a pitch for each book that was read, or you could invite an impartial panel to come in and watch the pitches.
Action steps:
( ) Teach students how to develop and deliver a pitch.
( ) Determine which story idea(s) will advance into the movie-making process. The number of winning pitches determines the number of movies your students will be making so consider what you can manage.
Step 5: Collaboratively revise the story from the winning pitch
Students can work together in their book club small groups to help revise the story from the winning pitch for their text. As they discuss, they may find that details from the other students’ stories could enhance the winning story in some way. The revised story becomes the property of the group, and it will benefit from opportunities for conferring just as any other writing would.
Action step:
( ) Consider using outsiders for conferences to give a new sounding board to the young writers as they develop their ideas for their audience.
Step 6: Storyboarding
Students essentially take their stories and turn them into comic strips. This forces them to think about scenes, key events, and dialogue. Interestingly, the authors advise against using technology for this stage because the students can get too caught up in playing around with features, perfecting their storyboards, etc.
Here’s a great Prezi I found for introducing and explaining the purpose of storyboards:
Action step:
( ) Create story board templates for students and support them as they develop their complete storyboards.
Step 7: Write the script
Scriptwriting is a great way to teach students how to show, not tell, how characters are feeling because they can’t rely on a narrator to describe feelings - actions and dialogue have to do the heavy lifting. Such a process will help students revise and tighten even more as they modify their stories to meet the conventions of an actual screenplay.
Here is a workbook that I previously downloaded for free from the Young Writers Program Script Frenzy website, but it seems that Script Frenzy has since died, and they no longer offer this resource on their website (only stuff for NaNoWriMo).

Action step:
( ) Consider downloading scriptwriting software (e.g., www.scripped.com) to ease the process.
Step 8: Learn about the jobs in a movie-making process
Students will need to decide on roles such as actors, set designers, directors, and camera operators. The authors offer some mini-lessons for this in the appendix, and they recommend having the students apply for jobs. Given the size of some groups, it will likely be necessary for students to assume multiple roles or participate as actors in multiple films.
Action step:
( ) Use your blogging platform to have students apply for jobs. They should explain what skills they possess that make them best suited for that particular role.
Step 9: Film the Movies
Much like a Hollywood movie, students should be given a timeline for completing the filming process. They’ll need to plan locations, props, costuming, and any other special effects that need to be considered prior to the day of filming. They’ll also want to rehearse their lines and block scenes to enable the filming process to run smoothly. Given a tight schedule and limited resources for their no-budget films, they’ll realize the importance of collaborating to make the process work.
Action step:
( ) Develop a timeline for filming. Communicate expectations for filming days so that students can plan in advance.
Step 10: Edit the Final Films
The authors discuss Windows Movie-Maker, but you could also use iMovie for this process. At this stage, students will work together to piece their scenes together and add special effects like slow motion, music, voice overs, green screen backgrounds, closing credits, etc. Some groups may also opt to include bloopers and outtakes in their final versions. This will be the culminating product of their weeks of hard work.
Action steps:
( ) Determine the editing software students will use to edit their final films.
( ) Plan a film festival/viewing party to create a deadline for project completion. Consider inviting parents and/or other classes to diversify the audience.
I really enjoyed reading this chapter, and I’m definitely looking forward to trying a project like this in my own classroom. If you haven’t already picked up a copy of the book When Writing with Technology Matters, I highly recommend it. They have student examples, handouts, and mini-lessons that enhance these steps even more.

What are some good books that you use in your classroom reading groups that you can envision as a screenplay? I’d love to hear your suggestions in the comments!
I'm heading to ISTE here in Atlanta for the next few days, but I'll be back next week with lots of ideas from all that I'll learn at the conference! Be sure to follow me on Twitter and Instagram @eberopolis if you want a sneak peek of all that I'm seeing and learning!
I'm heading to ISTE here in Atlanta for the next few days, but I'll be back next week with lots of ideas from all that I'll learn at the conference! Be sure to follow me on Twitter and Instagram @eberopolis if you want a sneak peek of all that I'm seeing and learning!