Monday, July 20, 2015

Getting Started with a Flipped Classroom

Last week, I shared a bit about why I flipped my classroom, and I got some great questions! Today I want to share a bit more about my process and the logistics for flipping. There are lots of ways to do it, and I'm sure there are many other great ideas out there, but this is what has worked for me so far.


1. Plan your lessons 

a) Does it make sense to flip?
You don't want to flip for the sake of flipping. I always ask myself, "Would this lesson make sense as a flipped lesson?" There are times when some introductory lessons require lots of hands-on scaffolding, and my answer might be "no." But other times, when the lesson is mostly information and practice, the flipped model absolutely makes sense.

b) What content must be covered?
I go through my math lesson plan, and determine the content that has to be covered in the video. I'm really selective about this because I want my video to be less than 10 minutes long. It's still a mini-lesson, after all, and if I go any longer than that, my students will tune out. Plus, even though the video may be 10 minutes, the viewing time could be much longer than that if students are pausing the video to write things down or take notes. I try to keep in mind the idea that less is more.

c) Am I the best person to deliver the content?
Usually my answer is "yes," but not always. I've tried to share videos from Khan Academy or LearnZillion in the flipped model, and the kids just didn't respond as well to those. They're more likely to tune in when the video is made by their teacher because they have a personal connection. There were a few times when I've used someone else's videos because the production was significantly better in some regard (e.g., it included songs or humor that I couldn't pull off). But usually, I make the videos myself.

2. Choose your tools

Once I know the content of my lesson, I decide what method I'll use to produce the video. I choose from a few different options.

a) Screencasts
Sometimes I have a presentation already created in a flipchart for my ActivBoard, and I can just film my voice interacting with my computer screen on that. My favorite tool for screencasting is Screencast-o-matic. It's very user-friendly and it uses a yellow circle to highlight your mouse so students know where to focus their attention. The free version works well, but for $15/year, you can get lots more editing and uploading options. If you're interested in screencasting, I would recommend trying out the free version for a while to see if it's something you'd like.

b) Whiteboard apps
Usually I use whiteboard apps such as Explain Everything or Educreations to make my flipped lessons. I always create the slides in advance so that I don't waste precious recording time writing out problems or building models that could simply be explained. Then once all of the slides are in place, I'll record the audio over them. This approach also allows me to work in pieces, too, because I never know when I'm going to get interrupted.

c) Paper slide shows
I've blogged about paper slide shows before here. Sometimes the lessons are a bit more hands-on (e.g., using a protractor), and I want to show students some examples. In those instances, I use my DEWEY Document Camera Stand ($120, www.copernicused.com) that turns my iPad into a document camera, and I work and film underneath it. I mostly use this approach with Geometry and Measurement standards, but when I need to do a lot of physical manipulations, the paper slide show works well.

3. Choose your platform

Once I've made the video, I need to upload it to a platform for students to view. YouTube is blocked for students at my school, so I use Vimeo instead. I ended up buying a Vimeo Plus subscription last year ($59.95/year or $9.95/month). That gave me much more space for uploads each week (5 GB vs. 500 MB with the free version), and it sped up my upload times, so it was worth it to me when I was crunched to get the videos uploaded after school. I created a channel for some of my videos, and now I'm going back to re-make some or better tag/organize the videos for each unit.

4. Share your content

Once the videos are uploaded on Vimeo, I needed a way to share the links to the videos. When I started, I was posting the links after school each day, but I eventually cut out that step. Now I make one Google Document each term with all of the dates and lesson topics, and then I just copy and paste the links into that document as they're done. That helps my students because they find the video links in one spot, and I can post the links as they're available. Here's an example of what that document looked like one term.

Bonus Tips

1. Make your videos in batches. 
I found it much easier to make all of my videos for the week at once. I could usually tackle this in a couple of hours each week, and it was much less stressful than trying to film every day. I was able to find my rhythm with the process when I batch-produced videos, so that's how I try to work now. 

2. Start small.
Even if you only make one video each week, you're still starting to build a library of flipped lessons for future use. I didn't make as many videos as I'd wanted to last year, but I'm grateful for the ones I already have done because that's less work I'll have to do this year.

3. Divide and conquer.
See if someone else on your grade level team would be interested in flipping with you, and then divide up the lessons. Even if you're not the one teaching the lesson in every video, the students will appreciate it being someone they know. 

4. Get some cheap .mp3 players for student check-out.
Most of my students had Internet access at home to watch the videos, but a couple didn't. I wrote a grant to buy 10 inexpensive .mp3 players that students could check out to watch the videos. They didn't require an Internet connection because I saved the videos straight to the hard drives, and since they were cheap .mp3 players (<$20 each), they didn't have any bells and whistles to make them targets for theft. It was a workable solution for those students who lacked technology access at home. 

Next week, I'll share more about what my math block looks like under the flipped model. Until then, I'd love to hear from you. What are some tools you use for video production in your class? What challenges do you foresee with a flipped model? Share your thoughts in the comments section.

Monday, July 13, 2015

5 Reasons to Flip Your Math Class

Of all the subjects, math is probably my favorite to teach. But it is definitely not easy. By the time students are in fourth grade, there's often a wide range of abilities. Last year, I had students who could barely add and subtract and others who were working well beyond grade level. Trying to design lessons that worked for them was a real challenge. If I moved too quickly through the lesson, several students would get lost. If I moved too slowly, others would get bored and start causing different problems.

Then I attended the Georgia Educational Technology Conference and heard some sessions about flipped teaching, and a lightbulb went off.

If you're not already familiar with flipped teaching, the idea is that we need to "flip" the traditional way we teach -- lesson at school, practice problems at home as homework. Instead, students should watch a short video lesson as homework to prepare for class, and then the majority of class time is spent working on practice and application while I'm there to guide them.

I did this pretty consistently for the second half of the year, and I couldn't be happier with the results. There were so many advantages.


1. Students became more confident.

For some kids, math can be intimidating. Everyone works at different speeds. What may be an obvious concept for one kid may take multiple explanations for another. There's lots of vocabulary and room for mistakes, and when you feel like other kids are getting it faster than you, your confidence suffers.

All of this went away when I flipped.

Students were watching the videos at home on their own. No one knew whether they needed to replay something a couple of times until they got it. No one knew that they had to pause the video for 5 minutes to try a problem that others would have solved in 30 seconds. They could all work at their own pace, and they came to class more confident and prepared for practice the following day. The attitude shift in my students this year was reason enough for me to continue flipping.

2. Parents were less stressed.

There have been so many times when I've heard parents complain about math or express their discomfort in helping their child because they weren't taught math the way we teach it now. And I get that. I remember thinking in my math methods courses that I could have been great at math if someone had explained it to me better as a child rather than having me memorize algorithms.

Having the flipped model created allies from a lot of math-hating parents. Some would watch the videos along with their children and have those lightbulb moments where concepts and strategies would suddenly make sense. Others expressed a sense of relief that they didn't have to worry about "undoing" the things we were doing in the classroom by just jumping to the standard algorithms. We were all more comfortable with the math.

3. I had more time to see what students could actually do.

While I always tried to keep my in-class mini-lessons short, there were days when they would drag on because some kids just weren't getting it. By the time I felt confident they could try some problems on their own, we hardly had any time left. And by the time they got home to do it as homework, they'd forgotten what we'd spent the morning talking about, so they were back to square one.

Now that I've flipped, I only need 5-10 minutes maximum at the beginning of my math block to do anything whole group. I spend that time answering questions, clarifying any misconceptions, and checking the 1-2 practice problems that I typically include at the end of the video. The rest of my math block was then spent working with small groups, conferring with kids, and getting into richer practice and problem solving than I could ever fit in before.

I also didn't have to worry about students getting the right answers only when their parents "helped" them. When it came time for assessments, I had a much better sense of where my students were at and what to expect from them because I was more deeply involved in their learning.

4. I didn't have to worry when we had a sub. 

In the past, I would write off sub days as lost instructional time when it came to math. Now that I've flipped, that is no longer the case. I include a link to the video I've created in my sub plans, and I have the sub watch the video with the class again to start the lesson. Usually that gives the sub enough background knowledge to help with the learning task, and my students have enough scaffolding from my instruction that they can work through the practice. It made those lost days so much more productive.

This year, I will be on maternity leave for 12 weeks, so I'm nervous about what will happen with my kids while I'm gone. But I'm less nervous about the math because I already have videos made for most of those lessons from last year. My students will have continuity in math instruction because of it.

5. Students were more successful and could tackle bigger challenges.

Last year was my best year ever as far as student performance on end-of-year assessments and benchmarks. I think a big part of that can be attributed to the move toward a flipped model for math. My students had more time and confidence to master the fourth grade standards, and as a result, I was easily able to push them into bigger challenges. When I surveyed the students mid-year about the flipped model, their responses were overwhelmingly positive in support of it, and I knew it was something I need to continue in the years ahead.

Next Steps

This will be the first year that I use the flipped model for the whole year, so I will need to prepare more video lessons and give some thought to how I'll transition my students (and their parents) toward this model. In the weeks ahead, I plan to share more about the tools I use to create flipped lessons and some troubleshooting tips for problems that might come up.

Now that I have some experience flipping, I'm going to go back and reread Flip Your Classroom: Reach Every Student in Every Class Every Day by Jonathan Bergmann and Aaron Sams. Jon was one of the speakers I saw at GaETC, and he's one of the founders of the flipped classroom movement. I read the book quickly as I started to flip, but I think there are more ideas to be pulled from it.


I'm also starting to think about other areas where I could flip instruction. One possibility might be some of the grammar, vocabulary, and word study components of my ELA block. I consistently struggle to fit everything in to that time, and flipping might be the answer. I've downloaded the book Flipping Your English Class to Reach All Learners: Strategies and Lesson Plans by Troy Cockrum, and I'm hoping that will give me some more inspiration.


Have you tried flipping any parts of your instruction? I'd love to hear more about your ideas and experiences in the comments!

Wednesday, June 17, 2015

Teachers' voices matter, and I want to hear from you!

Hi bloggy friends! I know it's been forever since I've updated this blog, and trust me -- lots of ideas are percolating in the hopper about my flipped(!) fourth grade classroom and other things I've tried this year. I promise those posts are coming! But in the meantime, I need your help!

As some of you may know, I'm working on my PhD in addition to teaching fourth grade full-time. The work-life balance has not been an easy thing, and now, I'm really working hard to finish as much coursework as possible in the short term because baby #2 will be arriving in November! (So while you all are hanging out by the pool having tasty margaritas, I'm crunching numbers for a stats class and reading about how to write ethnographic fieldnotes. Good times, I tell you...)

This summer, I'm starting to work on my dissertation, and I'm testing out my ideas in a pilot study. I'm planning to write my dissertation about the amazing elementary blogging community and the ways that teachers use blogs for professional development and personalized learning. I know that reading other teachers' blogs has been hugely inspiring for me as a teacher, and I can't imagine what I would do if I didn't have access to so many great teaching minds across the globe. Shockingly, however, very little has been written about these great online communities and their benefits, and I want to explore that further. Scholars, politicians, and administrators need to know how much teachers learn from each other! Which is why I need your help.

I'm looking for a few teachers who would be willing to be interviewed about how they use blogs to support their work in the classroom. I want to talk to both bloggers and readers, so even if you don't have a blog of your own, I'd still like to talk to you. This first wave of interviews will take place next week (June 20-26) and they will all be done online via Skype or Google Hangouts. I anticipate that each interview will last 45-60 minutes.

If you are willing to participate, could you please fill out this form so I can contact you directly? In exchange for your time, anyone who participates in an interview will receive up to $20 worth of free products from my TpT store.


Once you fill out the form, I will be in touch to arrange a time that will work best for the interview. I need to conduct (and transcribe!) at least 3 interviews next week to fulfill the requirements of my current coursework, but don't let that small number deter you -- I will need many more interview participants once I move beyond my pilot study and begin work on my actual dissertation, so I'd love to have a list of possible interviewees already started. And my offer for the free products from my TpT store will still stand.

I hope that you will consider participating! I look forward to talking to you and learning from you.

Friday, January 2, 2015

Five for Friday - Winter Break Edition

Today is the FIRST time that I've ever linked up Kacey and the Five for Friday Linky Party even though it's one of my favorites. I love seeing pictures of what all of my teacher friends are up to each week, and in the spirit of getting back to my blog--let's do this!


{1}


Usually my winter breaks are a little over a week long, but this year, I got two full weeks -- one with my family in Michigan, and one at home with my favorite three-year-old. We had all sorts of adventures hanging out together this week, but one of my favorites was having a "pajamas and hot chocolate day" together. She is becoming such an awesome little person, and I'm proud to be her mommy. I cherish these days of hugs and laughter together.

{2}


We started implementing a "family game night" tradition this week, and it has been a lot of fun! Sydney is finally old enough to start to understand board games, so we used her holiday gift cards to build up her stash. We start out the night with some of her choices (The Sneaky Snacky Squirrel is a particular favorite!), and then after her bedtime, we move on to the grown-up games like Ticket to Ride and Dominion. I've always loved playing games, so I'm excited to build this into our routines.

{3}


I go back to work on Monday, but it's going to be a staff development day. I'll see the kids on Tuesday. I've finally reached the "acceptance" stage of my break where I'm accepting that I have to go back to work and need to get going on grades and lesson plans. I pulled out the Tuesday bucket today so I can start to tackle that. Wish me luck!

{4}


As much as I enjoy the holidays, I was a little happy that they're over so I can take a break from the holiday-themed Jamberry wraps and try some of the other ones I've been hoarding. This is my latest manicure -- Mixed Signals matte. I love it. Speaking of the hoard...

{5}


I'm hosting a Jamberry open house tomorrow for my friends who want to try Jamberry. I recently became a Jamberry consultant because I love the wraps so much and wanted to cut my expenses a bit. I'm so glad that I did--it's been a lot of fun, and it has helped push me out of my comfort zone. Plus my nails always look good now. :-) If you'd like to try a free sample, you can fill out my form at http://samples.eberjams.com.

Have a great week!

Thursday, January 1, 2015

Hello, 2015!

Another year is in the books, and as always, I'm excited to be seeing the start of a new year. Last year will be remembered for its big highs and deep lows, but I know that everything happens for a reason, and I feel like I'm in a good place to start 2015.

And one place I plan to start is being a better blogger! So here's my Currently post for January 2015.


Listening - It's my daughter's bedtime here, and my husband has bedtime duty tonight. It's a rare moment when the TV is off, the dogs are asleep, and all is quiet in the house. I'm savoring it.

Loving - I think that New Year's Day may be my favorite day of the year because it is a fresh start where it feels like anything is possible. I often feel this way at the beginning of the school year, too, but I think I prefer this time of year because there's more predictability with everything. I already know my students very well; we've built our routines and expectations, and the only things that need to be changed are the things I *want* to change. It's an empowering holiday.

Thinking - A major reason why I haven't been blogging much lately is because of my Ph.D. program. It feels weird to be writing something that doesn't have a lengthy bibliography attached to it! I continue to be excited about my dissertation topic, though, and I've been thinking about it more and more. I plan to write about the role of social media in teacher professional learning. The short version is that I'm going to study how reading and writing about classroom practices through blogging affects teachers' feelings of effectiveness in the classroom (self-efficacy beliefs). I think connecting with other teachers through blogging and other social media has been one of the best moves I've ever made as a teacher, and I'm curious to find out if others feel the same way and what consequences it might have. One of my classes this semester is actually requiring me to blog about my research, so I'll be setting that up in the next week. It will be a separate blog as I doubt my classmates in other programs will really want to read about Eberopolis, but I'll share a link here if you're interested in following or learning more.

Wanting - I had 18 blog posts in 2014. Pathetic. I have a notebook full of ideas, so now I need to get them out here. My goal is to blog at least once a week, and as I've been getting other things in my life better organized, I think that's realistic.

Needing - I set some big goals for this vacation as far as getting myself organized for the new year, and so far, I've done a great job. For example, I already have 2 months of healthy meals planned for my family (written on sticky notes so I can shuffle them around when stuff inevitably comes up).


And I've been cleaning closets and creating a new workspace to boost my productivity in the new year. I even made my annual pilgrimage to The Container Store today! I just need to wrap up my remaining projects tomorrow so I can enjoy my weekend before returning to school on Monday. (I'm @eberopolis on Instagram if you want to see more about those projects...). 

Finally, my three areas:

YES to my health. I lost nearly 20 pounds between Labor Day and Christmas, and while my trip to see my family for the holidays reversed that trend a little, I'd like to continue to focus on my health in 2015. I've been doing Weight Watchers, and losing weight has been easy when I've taken the time to plan what I'm going to eat and track what I eat throughout the day. I'm ready to get back on track.

Maybe to becoming a morning person. I already get to work by 7:15 each morning, but I would hardly call myself a morning person. I read The Miracle Morning by Hal Elrod over break, and it has me thinking about whether I should try to get up earlier to add things like meditation and exercise to my morning routines. I'm thinking I'll try it for a month and see how it goes. (The book was good, btw. An easy read to be sure). 

I wish...I love my job--I really do--but I'm starting to feel like it's time for me to tackle a new challenge. I want to be able to work with other teachers to help them troubleshoot issues in their classrooms, improve their teaching, and use technology more effectively. I purposefully chose to go into an Educational Leadership PhD program for that reason; ultimately I want to teach in higher ed and/or become an administrator. I'm not ready to do all of that yet, but I wish that I could find an instructional coaching position or something similar that would let me work more directly with teachers while I keep working on my program. It might be time to start that hunt this year. 

Okay, I promise I will be back soon...I have a couple of other posts in draft mode almost ready to share about some of the new things I've been doing in my classroom this year. Hopefully you'll FLIP when you read them! ;-)

Happy new year!

Saturday, October 18, 2014

Give Great Feedback (Without Going Crazy)!

I honestly don't know how high school English teachers do it. For years, I have struggled to keep up with the writing output of my fourth graders so that I can give them the high quality feedback they need so they can improve. I must say, however, that once again, technology makes this process SO much easier. Today I'm going to share some high-tech (and low-tech) ways to give great writing feedback without having to give up all of your nights and weekends.


Get your class to use Google Docs

I can't say enough good things about using Google Docs with my students this year. We use it for drafting and publishing, and the students share their docs with me the minute they start working on a new piece of writing. A few reasons why I love it: 

1. I can keep tabs on my students. We all have those kids who look like they're working but really aren't. Or those who just struggle to get ideas down. In the past, when I used notebooks, it might take me a couple of days to realize that a student was struggling. Now, I can leave those students' documents open on my laptop and see in real time what's happening in their writing. It makes them and me more effective during our writing block.

2. It's a great source of data. I was working with a student in RtI, and one of the data points I had to collect was how much writing she was able to accomplish during our writing block. Google Docs allow you to go back through a document's revision history so I could see what the writing looked like each day. I could track word counts and changes, and I could even see if she had worked on it at home (where the big changes seemed to happen). All of that information was very helpful and far more than I could have gathered using a notebook.

3. It makes conferring and feedback easier. I can have students ask me questions about their writing, and I can immediately pull it up and see it. I can also track when I've given feedback and which feedback gets used or ignored. It's a great record of my work with students.

Consider a Feedback Add-On

When I went to ISTE this summer, I learned about Kaizena, a tool that integrates with Google Drive and allows you to give feedback in a variety of ways. For example, you can:

  • Give audio feedback -- make comments about the paper by talking to the student about his or her writing. It will record your comments and embed them to the document. This would be SO much faster than typing things out.
  • Re-use comments -- if you find yourself making the same comment over and over again, you can create the comment once, tag it for easy finding, and use it again later. Talk about a time saver!
  • Embed videos -- sometimes students benefit from short movies or examples that teach a particular skill. It's like a personalized mini-lesson.
The problem? As of this writing, the app doesn't work with the iPads. Kaizena creates a link in the first comment and that link directs students to their platform, but links like that aren't clickable through the comments on Google Docs' iPad app. It would be great for a class with 1:1 laptops, but that's not where I'm at. I've heard that an iPad app is in the works, but until then, I'm having to devise my own alternatives. 

Build Your Own Comment Library

Inspired by the concept of Kaizena, I've started to build my own reusable comment library for those comments that apply over and over again. I'm just using a Google Spreadsheet, and I've divided it into the following columns:

1. Tag - a word or phrase to help me find the comment. Examples:
  • Capitalization - Proper Nouns
  • Run-on sentences
  • Then vs. Than
2. Comment - type out the exact text of what you want the comment to say to address a particular skill or issue. Wherever applicable, include a link to an additional resource students can use for more examples of what you're talking about. I tend to include titles of BrainPop videos or links to Vimeo clips (not blocked by my school's webfilters, unlike YouTube). While my students still can't access the links in comments through their iPads, I can let them use one of our classroom laptops to view the particular video. The fact that it's just one comment vs. all of the comments make this option work for us over Kaizena. Here's an example of a comment I gave a student who was confusing "Then and Than" 
  • You are confusing two words that sound similar to one another: "then" and "than." The first minute of this video may be helpful to you: http://vimeo.com/103071955 (you do not need to watch the whole thing)
3. Related Standard(s) - This is just one additional way for me to search through my comment library. Plus, if I find myself giving the same comment over and over again, I'll know which standard I may need to revisit in an upcoming lesson.

Why a Comment Library is a Huge Time Saver

My comment library allows me to give more thorough feedback in much more depth. Unlike a checklist or a rubric, I'm offering very specific feedback and suggestions targeted toward exactly what I see in a student's writing. When I notice something happening in the writing, I can highlight it, hit the comment button, and copy & paste the relevant suggestion into the comments section. I can do this quickly and still have time to type some individualized suggestions that may be relevant to the student. It's much more thorough than anything I could ever do on paper.

In addition, my comment library is constantly growing as I find new resources and see different things happen in students' writing. I've only been doing this for about a week, and it's becoming a great tool to help me curate resources and differentiate instruction.

Get Involved

As I mentioned, I've just started building this comment library on Google Drive. If you'd like to see it, you can view it here. If you'd like to get involved as a contributor, you can contact me via email or blog comments and I'll share the document with you so you can edit and add. 

Halloween Fun!

This is off-topic, but I was super excited at the arrival of my Halloween Jamberry nail wraps this week, and I finally tried them out today! 


I love the purple color and the subtle flare of bats flying around. It makes me feel festive without going over the top. I still have some Jamberry samples available to mail out, so if you'd like to try Jamberry nail wraps for yourself, I'd love to share! They're easy and fun, and they come in so many styles that you're sure to find some that you love. You can visit my Jamberry site or email me at eberjams (via gmail) to request a sample. 

Have a great weekend!

Sunday, October 12, 2014

3 Ways to Pamper Yourself When You're Low on Time

Have you ever heard the expression "There's no tired like teacher-tired?"  I didn't become a coffee drinker until I started teaching, and it seems like every teacher I know juggles way too many responsibilities. We teach, we parent, we study, we meet, we plan, and somewhere in that mix, we're supposed to take care of ourselves and our families as well. Talk about a tall order! I've never been great with the work-life balance, but as I've been increasingly pressed for time this past year, I've learned to prioritize and find shortcuts so that I can still feel pampered despite feeling crunched. Today, I'll share 3 of my favorites.

1. Jamberry Nails

I've seen bazillions of teachers blog about Jamberry before, and I'll admit that I was skeptical. I love getting my nails done, but I lack the time and budget to do that with any regularity. Not to mention, manicures never hold up on my nails. They always smudge or chip within a day. Getting gel manicures has helped, but those take a long time to put on and take off. And usually, I destroy my nails taking them off, too, because I'm impatient. 

In May, I tried Jamberry Nails for the first time, and I'll never go back to anything else. They're super easy to apply (20-30 minutes tops, and I'm slow relative to some people I know), and they last up to 2 weeks even with the heavy activity that comes with being a teacher, wife, and mom. Usually when I change them out, it's because I want a new pattern and not because the wraps are coming off. For example, check out these awesome Halloween wraps (which will be going on my nails next):


They look much more vibrant than any polish I've used, and they're not expensive. A sheet of wraps yields 2-3 manicures + at least 1 pedicure. If you have really short nails, you could probably get more out of them. I always buy them using the buy 3 get 1 free deals, so it's less than $5 for a mani/pedi for significantly less time and effort. 

I like Jamberry so much that I just became a Jamberry Independent Consultant (mostly so I can get the consultant discount on my nail wraps -- I want them all!). If you haven't tried them yet, I'd be happy to tell you more or hook you up with a sample to try for yourself. You can find out more by visiting my Jamberry website and liking my Jamberry page on Facebook. Or just leave me a note in the comments section, and I can arrange for a sample to be sent to you.

2. Gwynnie Bee

As a plus-sized person, I've been super jealous of all of the cute teacher-y clothes that friends have been posting from Stitch Fix. But I finally found an alternative that I love in Gwynnie Bee. Gwynnie Bee is a clothing subscription service that is like the Netflix for clothes. You select a plan (I'm currently on 3-at-a-time), load up your "closet" with clothes you like, and sit back and receive outfits from your virtual closet. If you like it, you can wear it and send it back when you're through with it or buy it at a discount. If you don't like it, you can immediately send it back to exchange for something else from your closet. There's no limit to how many outfits you are sent each month, and you can alert Gwynnie Bee that you're sending something back so they'll send you your next item.

I love my Gwynnie Bee subscription for a variety of reasons:

1. It's convenient - The clothes are delivered to my doorstep, and they have a prepaid plastic envelope so I can send them back. I'm constantly getting new outfits to try.

2. It's a time-saver - I don't shop nearly as much as I used to, and I don't have to do as much laundry or dry cleaning because Gwynnie Bee takes care of it all. 

3. There's no guilt - Shopping for plus-sized clothes gets depressing because selections are always more limited or dowdy, and while catalogs offer better selections, I never know how it will fit me. Now, I can have clothes delivered and not feel bad sending them back if they don't turn out as well as I'd hoped. 

4. You stumble onto great dresses you'd never find otherwise. Check out this fab retro dress that I ended up buying:

The minute I tried that dress on, my husband told me to buy it. Who could argue with that?!

5. It's perfect during transitions between sizes. I gained a bit when I had my daughter, and then I packed on a few more pounds when I started working on my PhD last year. I started Weight Watchers around Labor Day, and I'm already down 10 pounds (woo hoo!). I intend to keep on losing weight, but I don't want to have to buy a whole new work wardrobe at each step along the way. Now I can just go in and adjust the sizes on the clothes in my closet (they have sizes 10-32). 

Gwynnie Bee offers the first month free, and I highly recommend it. You can check it out using this link.

3. Birchbox and Ipsy

I started subscribing to Birchbox and Ipsy about a year ago. I'm not a huge makeup or product person, but I like trying new things, and it's fun to get a package every month. It's a small indulgence that makes me feel extra pampered. For example, this month, I received this amazing rosemary-scented shower gel in my Birchbox, and it's something I never would have found otherwise. In my experience, Birchbox tends to have more high end products while Ipsy has larger midrange samples that come in cute bags. I look forward to receiving both.

Treat Yourself

The older I get, the more I realize how important it is to take care of myself. This is true especially when everything gets busy and chaotic between work and grad school and caring for my family. I don't get to go shopping or go out for mani/pedis anywhere near as much as I used to, but I don't need to. There are so many amazing services and products out there that you can treat yourself even when you're extra busy. 


Finally, while I've been trying to take more time to pamper myself this year, I've had some help in the "feel like royalty" department. I was shocked beyond words when I was named Teacher of the Year at a faculty meeting last week, and my dear friends went out of their way to make me a crown, a tutu, and a sash for the local homecoming parade last week. They even made a matching tutu for my 3-year-old (who loves tutus). I work with some pretty amazing teachers, and they definitely inspire me and push me to be the best teacher I can be. I'll be sharing some of our amazing projects together in some upcoming posts, but I have to thank them for all they do for me each and every day. Loving what you do and where you work is the best kind of pampering of all. 

Saturday, September 27, 2014

The Easiest Way to Implement a Classroom Economy

As my life continues to get crazier, I am constantly looking for ways to simplify and improve the things that I do. This year, for example, I decided to merge Class Dojo with my classroom economy, and so far, it's going very well! Here are some of the tweaks I made to make this merger work.

My Classroom Economy

I've been using a classroom economy since I started teaching, and every year, I make a few tweaks. The basic idea is that every student applies for a class job at the beginning of each term (our terms are 6 weeks long). I've previously posted about my classroom jobs here. I display the jobs in my classroom so that we're constantly reminded who is responsible for what. This year, I've used a pocket chart for my classroom jobs (sorry for the blurry photo).


I used to give students $100/week as their salary, or about $20 per day. They'd have weekly and monthly expenses, and then they could use any remaining money to purchase items in our class store. The complete program is detailed in my Classroom Economy Megapack on TpT.


I love the system, but I felt like I wasn't as consistent as I wanted to be in tracking student behaviors to give fines or bonuses, and there were many Friday afternoons when I was so involved in whatever we were working on that day, that I just didn't leave enough time for them to shop. 

Meanwhile, I was dabbling with Class Dojo, and I wanted to figure out a way to tie that in as well. If you're not already familiar, Class Dojo is an online behavior management system that allows you to give and take away points from students. You can create your own categories for points, and you can access the class info from any device -- laptop, computer, iPad, iPhone, etc. I liked that portability because I always have one of those devices in my hands, and I could give or take away points without really interrupting what I was doing. 

The solution came for me this year when Class Dojo allowed for the creation of weighted point values! Before, you could only give or take away a single point at a time. Now you can create points on a scale of 1-5 and weight particular behaviors accordingly. This is done in the set-up for behaviors. 

1. Go to Edit Class on your class screen and select "Edit students and behaviors."


2. Select "Behaviors" and either click on one of the exiting behaviors, or the plus symbol to customize the behaviors.


3. Change the icon (optional), name or rename the behavior, and then click the box to access a pull down menu of point values to weight that item.


And that's it! You can weight both the positive and negative behaviors according to your needs. Here are the settings I have now for my classroom economy.

I basically divided the $100 weekly salary by 10, and scaled everything else back the same way. Students now get 2 points daily for their salary (10 points per week) and bonuses for different behaviors. The only other positive behavior that I've weighted more currently is helping others because I'm really trying to encourage that in my classroom. I'm also going to add a +4 for a class compliment because I like when they do a good job with other adults in the building.


For negative behaviors, I deduct more points for breaking rules outside of my classroom and for disrespecting people or materials. I also now deduct their taxes and rent through Class Dojo, and when they shop, I deduct their points in here. I price everything in multiples of 2, but then I found that I wanted a -5 shopping once they had enough points for some of the larger ticket items in our class store. I dislike that it shows up in the "Needs Work" tab, but I don't think it's a problem overall. The parents know what is happening from the descriptors, and we just talk about it in class from the stance of making or spending money. It's the easiest way to deduct some points without resetting the points entirely.

Since transitioning to this modified system 7 weeks ago, my classroom economy has become more accurate and effective in a fraction of the instructional time. Class Dojo has replaced the clip chart that I used to use, and it helps with some of the accounting. I'm still using the bulk of the resources from my Classroom Economy Megapack, however.

If you're interested in trying out Class Dojo with the rest of my Classroom Economy Megapack, I'll be offering the product on sale at half price through Tuesday. It is one of my best sellers, and if you're looking to change up your classroom management routines or enhance your existing classroom economy, I don't think you'll be disappointed. I've also discounted the rest of my TpT store 20% to celebrate my return to blogging after a busy start to the school year. Those sale prices will go now through Tuesday, so check them out!

Join the Mailing List! 

Did you know that I have a mailing list so that you'll never have to miss a post? Use the link at the top right of this page (under Never Miss a Post) to subscribe to my mailing list. You'll get my posts delivered to your inbox, and you'll also get access to some extra resources that I'll be offering to my mailing list only. Given that my PhD work has really cut in to my blogging time this past year, the mailing list is the best way to make sure you see my new content. I promise not to spam you or share your contact information ever. 

Have a great week!

Monday, July 14, 2014

Top 10 Gadgets for a Tech-Loving Teacher

I leave tomorrow to go on an overnight faculty retreat with my colleagues, and as I started to pack my bag for the trip, I realized that I love gadgets. What started as a pretty basic love of smartphones, Kindles, and iPads has blossomed into a love of accessories as well. While I won't be packing all of these items for an overnight trip, I thought I'd share my 10 favorite gadgets for the tech-loving teacher.

1. ScanSnap Scanner

This has played a major role in helping me go paperless in my classroom and my personal life. The ScanSnap is a lightweight, portable scanner that can handle 12-15 double-sided pages at a time. It syncs with Dropbox and Evernote (two apps I love) so I can hold onto information without having to keep the piles of paper that come with it. For example, there are a bunch of forms that I'm required to use at school for various things. Rather than keep a file of them all cluttering up my desk, I just scan them with the ScanSnap and print them whenever I need them. I'm far faster at locating items on my computer via the search feature than I am at finding a random piece of paper, so this has been a life-changer for me.


2. Charging Hub

Having a lot of devices can be a problem when it comes to keeping them charged. I hated the clutter of all the chargers and the ugly power strip sitting by my nightstand. I recently solved that problem by purchasing the Anker 40W 5-port USB Charger.


One plug charges up to 5 devices via their USB cables. When there are limited plugs available, this is a great tool to have. It streamlines the clutter and the tangle of cords. I like it so much that I'm planning to get a second one for my classroom.

3. Cocoon Grid It

When you travel with a lot of gadgets -- even just between home and school -- you inevitably have a lot of cords and things that can get lost in your bag. For a while, I tried to assign items to various pockets to try to keep them organized, but that never worked very well. I'd forget what went where and spend way too much time digging around for something. That changed once I got the Cocoon.

It's about the size of a piece of paper, and it has several woven elastic bands that can hold items in place in many configurations. It's a great resource for keeping your smaller gadgets and their cords neat and tidy in your bag.

4. Portable Charger

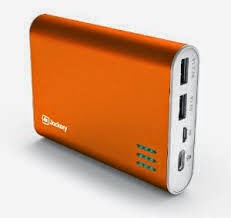
One of the biggest challenges for me is keeping everything charged throughout the day -- especially when I go from school to grad classes at night. In some of my college classrooms, there are very few outlets, and it's hard to get a seat near one. That's why I love the Jackery Giant portable charger


Small and portable, I can charge this through my laptop, and then it can charge my other devices when I'm on the go. It came in especially handy while I was at ISTE recently, and I love it for travel. You can charge two devices at once, and it holds enough power to extend your device's battery by 500-600%.

5. Eye-Fi Mobi

I love using my good camera -- not the one on my iPhone, but my actual Sony digital camera. One of the things I hate, however, is taking out the memory card to move pictures from my camera to my computer. Invariably, I leave the card in my computer and don't have it when I go to take pictures, or I leave pictures on my camera forever and miss opportunities to share them in blog posts or with family in a timely manner. Then, I met the Eye-Fi card.

This card works like a typical memory card, but because it has WiFi capability, it can automatically send the pictures to my computer as I take them. It's a huge time-saver for me, and it has encouraged me to use my camera far more than I had been using it.

6. Jawbone UP

I'm on my feet a lot throughout the day, and I'm not the best with making time for exercise or sleep. I've had a Jawbone for over a year now, and I love it. It helps me keep track of my steps and my sleep quantity and quality so I can set goals for myself in both departments. It's comfortable and flexible so it doesn't bother me when I'm typing or sleeping, and it's waterproof so I can even wear it in the shower.
Like many teachers, I struggle with work-life balance, and this helps me gauge when things are really getting out of whack. 

7. Fine Point Stylus

I love using my iPad for note-taking, annotating documents, and making tutorials for my students. However, I hate drawing with my fingers because I feel like I'm less coordinated using my index finger relative to a pen, and most styluses are a little too nubby for me. I finally found one that I love in the Adonit Jot Pro

It has a fine-point with a small plastic disk at the tip, and while it's heavier than most pens I'd use, it is by far the closest thing to a pen-like feel that I've found for the iPad. I've had it since December, and I'm very protective of it. It's a must-have if you want to have more precision in your iPad creations, but be careful -- the small disk has popped off a couple of times in my bag, so you have to be careful about storage so you don't lose that piece. 

8. Canon SELPHY

I take a lot of pictures of activities in my classroom, and I like to be able to integrate those into bulletin boards to showcase student work. In the past, it was kind of a pain to print the pictures because I'd invariably have to get a bunch together, upload them to some website, and then have them printed by a 3rd party in a big cluster. I then received the Canon SELPHY as a gift from a family member, and it has eliminated all of the hassle from the process.

I can print from a memory card or send pictures straight from my iPhone or iPad to the printer, and it will print postcard sized borderless photos. I love that I can print wirelessly and as needed rather than having to put together an order that I eventually have to pick up from the store. It's much more efficient, and therefore more likely to get done.

9. IPEVO Point 2 View USB Camera

I use a document camera a lot in my classroom, but the ones my school has available take up tons of real estate on my desk. I also like to be able to have access to a document camera when I'm giving presentations for professional development sessions that I lead or presentations I give in my grad school classes, but I'm not likely to haul around a huge document camera from place to place. That's why I LOVE my IPEVO Point 2 View USB Camera

It is incredibly lightweight and compact, and it produces great images. I use it all the time, and at $69 on Amazon, I think it's a steal. I also like the fact that it can come off of it's stand, so if you're doing an activity in science where you want to look at something from an unusual angle, you have the flexibility to do so. If you don't have a document camera in your classroom, or you want something smaller, I highly recommend this.

10. Wireless Presenter with Laser Pointer

I find myself presenting a lot these days, both in and out of my classroom, and when I am, I absolutely hate to be tethered to my computer. I'd much rather be circulating among my students and interacting than staying in one place. I did some research on wireless remotes and ended up choosing the Kensington Wireless Presenter with Laser Pointer


It's small and comfortable to use, and with only four buttons, it's hard to mess up. My students love the laser pointer part of it, and I love how reliable it is. I've used it on many different computers -- Macs and PCs -- and I haven't encountered any hiccups yet. I've had my current one for three years, and the only thing I plan to replace are its batteries. 

Wrap-Up

So there you have my current top 10 list. With the exception of the ScanSnap and the Jawbone, all of the items are less than $100, and I've included links to each item on Amazon. (Those are affiliate links so Amazon will pay me a small commission if you choose to buy anything, but I'm only linking to items that I LOVE and USE constantly.) What are some gadgets that you love? I'd love to hear more in the comments as I start my back to school wish lists, so be sure to share. :-) And which gadgets do you currently use or would like to have in your own classroom? I'm always curious about the accessories as well.

Have a great week!

Friday, July 4, 2014

How to Outsource Your Running Records

Running records are the bane of my existence.

Ok. Maybe that statement is a little too strong. I really value the information that comes from conducting a running record, but my school requires that I conduct them every 6-12 weeks (depending on the student's reading level), and when I have to test 28 students, that takes a LONG time. Listening, recording, analyzing. Ugh. I can pretty much forget about teaching reading that week, unless I give some feedback after the students read (and then it takes 2 weeks to get through them all).

And then I went to ISTE and heard about Literably.


Literably is a service that audio records students reading Fountas and Pinnell leveled texts (A through Z) and sends you a complete running record within 24 hours. You set up your classroom, assign the level each student reads, and the student just hits "record" when he or she is ready to start. All that's needed is a microphone. Once the student has read for a minute, it automatically sends the recording off for analysis.

The analysis that comes back has all of the miscues, substitutions, and omissions labeled and analyzed for meaning, syntax, and visual errors. It also includes the rate in words per minute and the accuracy percentage. You'll also receive the audio file so you can share it with parents and listen to it yourself.

A free account includes 15 running records each month. If the audio quality is too poor for scoring, it won't count towards your 15. A premium account includes unlimited running records for one class and costs $19/month.

I will definitely be trying out this service. It will give me all of the assessment data I need while freeing me up to work with small groups and confer with students about the books they're reading. Talk about win-win.

Are there any apps or online services you use for reading assessments in your classroom? I'd love to hear about them in the comments!

Thursday, July 3, 2014

July Currently

How did it get to be July already?!?!

I'm still recovering from 3 days of EdTech awesomeness at the ISTE conference and linking up with Farley at Oh' Boy 4th Grade for this month's currently.


Listening - My two-year-old has recently become obsessed with Sofia the First on Disney Jr. It's a cute show, but not my favorite of the toddler choices...not that I've become a connoisseur of toddler TV or anything...

Loving - I started a garden last summer, but it became somewhat overgrown when Georgia had its monsoon season last summer, and it didn't turn out as well as I'd hoped. This year, we're in a new house, and while I don't have the yard space (or HOA permission) for a full garden, I have space on my deck for a container garden. I'm growing bell peppers, jalapeno peppers, herbs, tomatoes, squash, cucumbers, and carrots, and they're really coming along! My daughter and I check on them every afternoon, so it has become a fun summer project.

Thinking - This was my first year to attend ISTE, and I learned SO much. It was overwhelming, exhausting, and inspiring, and I just need a little time to process it all. I'll start blogging tomorrow about some of the coolest stuff I learned.

Wanting - I'm moving into a new classroom this year, so I had to box up all of my stuff at the end of the school year. I'm hoping (*fingers crossed*) that it all got moved to the new room (in a different building on our campus) so I can begin unpacking soon.

Needing - I'm a little panicked that it's July already. I have a lot of projects that are in various stages of completion, and while I know better than to think I'll get them all done, I'd like to check a few more items off my list before I go back to school in a few weeks.

4th Plans - I'm looking forward to a three day weekend with my husband and daughter. We don't have any big plans, but we may take Sydney to see her first fireworks extravaganza.

On a final note, as I prepare to move into my new classroom, I'm starting to think about decorating. The wall colors are very different in my new room, so my old stuff might not work. Here's a quick pic of the new room from my Instagram account:

I'd love to hear your color schemes/decorating ideas if you have any! The move-in and shopping spree will start next week!

Have a great weekend!

Friday, June 27, 2014

From Literature Circle to Student-Created Movie in 10 Steps

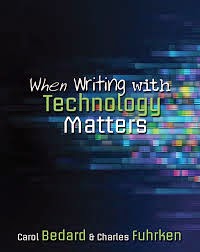
I'm continuing my summer book study of When Writing with Technology Matters by Carol Bedard and Charles Fuhrken, and I was blown away by Part 1 of this book.


Part 1 describes a project of reading and writing to launch moviemaking. It is a great example of incorporating authentic reading and writing tasks in the classroom, and it is definitely the type of project that is enhanced through technology integration. I've broken down the contents of this section into 10 steps for you to use in your own classroom projects.

Step 1: Choose books for reading groups

This project functionally starts with literature circles. Students are offered 4-6 book titles to choose from that reflect a variety of genres and themes. Bedard and Fuhrken point out a few considerations that are particularly insightful:
- Fantasy promotes more creativity in the movie making
- Realistic fiction will be more relatable
- Historical fiction facilitates research skills
- Protagonists should be similar in age to students
- Open-ended texts can be adapted into sequels while interesting main characters support prequels 

Action step:
(  ) Create a WebQuest that includes author websites and book review sites about each of the candidate books. This will allow students to make a good decision about which book is the best fit. 

Step 2: Set up Student Blogs for facilitating book discussions

Blogs allow students to engage in deeper discussions about their books and practice writing about texts. As a teacher, you can facilitate this by offering open-ended questions to guide student responses. Later, as students become more comfortable with the platform, you can model appropriate blogging behavior by leaving comments on students’ posts. Eventually, as students become more versed with the logistics of blogging, you can take more of a hands-off approach with limited interventions so the students can discuss the books independently.

Action step: 
(  ) Choose a blogging platform to use with students. One I recommend is KidBlog, which I’ve written about in the past

Step 3: Adapt the book into a screenplay.

Once students have finished reading the book, they should consider ways to adapt the book into a screenplay. In order to make sure the writing engages the students creatively, they should modify the story in some way. This would be an example of the types of creative reading often associated with fan-fiction. A downloadable poster of possibilities is below.


At this stage, students are working independently on their writing, taking the stories down different avenues according to their interests. It’s not necessary to complete the writing cycle at this stage—they merely need a workable rough draft.

Action step:
(   )  Give students time to write their story ideas for a screenplay. At this stage, it can remain a narrative and doesn’t need to be formatted into a script.

Step 4: Develop the pitch.

Screenwriters pitch their story ideas to studios all the time, making this an authentic part of the moviemaking process. Rather than simply reading their screenplay to the class, the authors describe 3 key components of a good pitch: 
* It grabs the audience’s attention through a hook or a teaser.
* It summarizes the story and identifies the genre without giving away everything.
* It’s delivered with high energy and excitement.  
A complete mini-lesson on giving a pitch is featured in the appendices of the book. 

Once students have developed and practiced their pitches, they’ll want to deliver them to their classmates to determine which movies will be made. You could have the class vote on a pitch for each book that was read, or you could invite an impartial panel to come in and watch the pitches.

Action steps:
(   ) Teach students how to develop and deliver a pitch.
(   ) Determine which story idea(s) will advance into the movie-making process. The number of winning pitches determines the number of movies your students will be making so consider what you can manage.

Step 5: Collaboratively revise the story from the winning pitch

Students can work together in their book club small groups to help revise the story from the winning pitch for their text. As they discuss, they may find that details from the other students’ stories could enhance the winning story in some way. The revised story becomes the property of the group, and it will benefit from opportunities for conferring just as any other writing would.

Action step:
(   ) Consider using outsiders for conferences to give a new sounding board to the young writers as they develop their ideas for their audience.

Step 6: Storyboarding

Students essentially take their stories and turn them into comic strips. This forces them to think about scenes, key events, and dialogue. Interestingly, the authors advise against using technology for this stage because the students can get too caught up in playing around with features, perfecting their storyboards, etc. 

Here’s a great Prezi I found for introducing and explaining the purpose of storyboards:

Action step:
(   ) Create story board templates for students and support them as they develop their complete storyboards.

Step 7: Write the script

Scriptwriting is a great way to teach students how to show, not tell, how characters are feeling because they can’t rely on a narrator to describe feelings - actions and dialogue have to do the heavy lifting. Such a process will help students revise and tighten even more as they modify their stories to meet the conventions of an actual screenplay.

Here is a workbook that I previously downloaded for free from the Young Writers Program Script Frenzy website, but it seems that Script Frenzy has since died, and they no longer offer this resource on their website (only stuff for NaNoWriMo).


Action step: 
(  ) Consider downloading scriptwriting software (e.g., www.scripped.com) to ease the process.

Step 8: Learn about the jobs in a movie-making process

Students will need to decide on roles such as actors, set designers, directors, and camera operators. The authors offer some mini-lessons for this in the appendix, and they recommend having the students apply for jobs. Given the size of some groups, it will likely be necessary for students to assume multiple roles or participate as actors in multiple films. 

Action step:
(   ) Use your blogging platform to have students apply for jobs. They should explain what skills they possess that make them best suited for that particular role.

Step 9: Film the Movies

Much like a Hollywood movie, students should be given a timeline for completing the filming process. They’ll need to plan locations, props, costuming, and any other special effects that need to be considered prior to the day of filming. They’ll also want to rehearse their lines and block scenes to enable the filming process to run smoothly. Given a tight schedule and limited resources for their no-budget films, they’ll realize the importance of collaborating to make the process work. 

Action step: 
(   ) Develop a timeline for filming. Communicate expectations for filming days so that students can plan in advance.

Step 10: Edit the Final Films

The authors discuss Windows Movie-Maker, but you could also use iMovie for this process. At this stage, students will work together to piece their scenes together and add special effects like slow motion, music, voice overs, green screen backgrounds, closing credits, etc. Some groups may also opt to include bloopers and outtakes in their final versions. This will be the culminating product of their weeks of hard work.

Action steps:
(   ) Determine the editing software students will use to edit their final films.
(   ) Plan a film festival/viewing party to create a deadline for project completion. Consider inviting parents and/or other classes to diversify the audience.

I really enjoyed reading this chapter, and I’m definitely looking forward to trying a project like this in my own classroom. If you haven’t already picked up a copy of the book When Writing with Technology Matters, I highly recommend it. They have student examples, handouts, and mini-lessons that enhance these steps even more. 


What are some good books that you use in your classroom reading groups that you can envision as a screenplay? I’d love to hear your suggestions in the comments!

I'm heading to ISTE here in Atlanta for the next few days, but I'll be back next week with lots of ideas from all that I'll learn at the conference! Be sure to follow me on Twitter and Instagram @eberopolis if you want a sneak peek of all that I'm seeing and learning!
Related Posts Plugin for WordPress, Blogger...