Pages

Saturday, April 28, 2012

Geometry Riddles and Interactive Word Walls

A couple of weeks ago, I blogged about using QR codes for differentiation in the classroom. Today I want to share another example of how we've been using them this year.

We were studying polygons and their assorted properties, so I had students write riddles to describe a particular polygon. The riddles could only have one possible answer, so they had to be very specific with their clues.

Once the riddles were written, we went to the Math is Fun Illustrated Mathematics Dictionary and looked up the term that was the answer to the riddle. We checked our riddle for accuracy using the definition, and then we made QR codes that linked to the term and its definition in the online dictionary. (QR code tutorial here).

The end result was an interactive word wall that really entertained my students.

Every chance they got, my students would come over to the display with their iPads, read the riddles, and then try to solve them. They could then check their work by scanning the QR code to see if they'd solved the riddle correctly. It was the most engaged I'd ever seen my students when it comes to learning vocabulary, and it made me think that next year, I'd like to create QR codes for the words on my word wall. It could be a fun way to review terms and make the displays more interactive. After all, if my word wall is going to occupy valuable real estate on my wall, then I want to get the most out of it. 

This was another activity that was pretty quick to put together. I think getting them all hung up on the wall took me longer than actually writing the riddles or generating the QR codes! But it was a fun activity, and I wanted to share it.

Have you seen any other examples of using QR codes in the classroom? What are some of your suggestions for doing so? Feel free to share in the comments below!

Friday, April 27, 2012

Tutorial - Build a Conferring Notebook with Evernote

The week of standardized testing and my sinus infection proved to be an exhausting combination that sapped all of my blogging strength. It's finally the weekend, though, so I'm back. Hooray!!!

Today I want to share a tip for building a conferring notebook for any subject -- especially reader's and writer's workshop.


Perhaps one of my very favorite tools to use for keeping track of things is Evernote. It's a free service that you can use to organize notes, pictures, and web clippings, and it works on any device -- laptops, iPads, smartphones, etc. It also recognizes text in pictures, and can search for that text. In my personal life, that feature comes in handy when I want to snap pictures of the label on a bottle of wine worth trying again or the hair dye color I'll need for doing touchups in a few weeks. But in my classroom, I like to use it for my conferring notebook.

This tutorial will help you get started with setting up your own conferring notebook in Evernote. All you'll need is an email address.

After you register, you'll need to check your email for a confirmation code to complete the registration process, but once you have that, you'll be ready to sign in and get going!

Underneath the elephant trunk in the upper left of the screen is a list of all of your notebooks. When you first get started, you'll have a default notebook that is your user name's notebook. I like to create special notebooks for the different subjects, however, so today I'll build a notebook for Writer's Workshop by clicking the down arrow by "Notebooks" and choosing "New Notebook." I'll give it a name (Writer's Workshop) and save it.

Once the notebook is created, I can make it my default notebook (the first notebook that launches when I open Evernote and the place where new notes get saved). You can do this by hovering your mouse over the notebook's name and clicking on the arrow beside it, then choose properties. You'll know which one is your default because it will have a star beside it. 

The next step is to make a new note. Typically, I create a new note for each student. 
(Note: I'd show you my real conferring notebook on Evernote, but it's got lots of student info in it that obviously can't be shared online. You'd mostly be looking at a blur. I'll revisit this topic as it gets closer to the next school year, though, and share more tips as I clear out this year's class.)

In the actual entries, I'll type the date and a brief note about what we conferred about. It automatically saves as I go, and I can set it to sort my files by the last updated date. This is useful so I can keep track of the kids that I haven't conferred with in a while. I can also take pictures and drag and drop them into notes. This is helpful if I want to take an image of a student's writing or a book he or she is working on reading. You can also send emails to your Evernote account and specify what notebook it should be filed in. 

The real advantage of Evernote is its portability. In the past, I've never really had a notebook system that worked for me. I couldn't keep up with all of my papers and artifacts, or I'd forget to bring it home with me over the weekend to plan instruction for the week ahead. Evernote works on any device and automatically syncs, so I can access my notebook anytime, anywhere. It's perfect for me as I circulate throughout the classroom, because I can use it on my phone or iPad -- items I'm likely to have on or near me anyway. If you're looking for a new system to use next year, I would highly recommend that you give this a try!

What do you use to record your conference notes? Do you use Evernote? Feel free to share your experiences in the comments below!


Wednesday, April 25, 2012

Guest Blogged Today!

If you are visiting from Misty's wonderful blog, Think, Wonder, & Teach - welcome! I was so excited to have the opportunity to guest blog there today about tips for introducing technology in the classroom.

I've been a bit under the weather this week, so I'm a couple of days behind on blog entries. I think I've finally turned a corner, though, so I'll try to catch up soon.

In the meantime, it's testing week in Eberopolis. Oh joy! (I hope your sarcasm detectors are well-tuned for that comment.) We spend approximately 2.5 hours testing every morning, and then we have to be quiet for another 30-45 minutes while other classes finish up. As you might imagine, my poor little 4th graders are getting stir crazy! What activities do you do in your classrooms during testing week to keep the kids engaged during your down time in testing week? I'd love for you to share your ideas in the comments section!


I'll be back tomorrow with a tutorial about one of my favorite tools for conferring notes!
See you next time!

Monday, April 23, 2012

Management & Mentoring Monday: Yes, No, and Sort Of

This will be a relatively quick post because it's late, I'm sick, and it's testing week. Blah.

One of the most brilliant things I ever saw for grading assignments came from one of my mentors, Nell Duke, at Michigan State. What she did was outline 3-5 different objectives that you needed to accomplish in an assignment, and she would phrase them as a question, "Did you...?". When it was time for her to grade the assignment, she'd answer the question with either a "yes," "no," or "sort of." If the answer was "yes," you'd get 2 points. A "sort of" was worth 1 point, and a "no" was worth 0 points.

Grading using this system is amazingly easy once you know what criteria you're going to use, and it helps students know exactly what is expected of them for the assignment.

Here's a free example of a "Yes, No, Sort of" checklist that I used with my students when they were writing book reviews of fiction books on KidBlog.


I know it's not glamorous, but it's free. :)  You can access it by clicking on the image above or clicking here.

In this example, I wanted it to add up to 35 points possible, so I weighted one category higher than the others. In some cases, there wasn't an opportunity to get a "sort of" -- either you turned it in on time, or you didn't, for example. So those were all or nothing point-wise.

We've moved to a different grading system this year, but I still like this way of communicating expectations and assessing student work fairly quickly.

Are there any tools you use in the classroom to make your grading more efficient? Feel free to share your strategies in the comment section below!


Until next time,

Saturday, April 21, 2012

Weekend Reading 4-21-12

Ok, I'm going to be honest. I wasn't reading as much as I wanted to be this week. I had a little craziness at work and family staying with me from out of state, so my reading list is a little bit sparse. I must say, however, that I have lots that I plan to be reading in the days ahead given the long list of fabulous bloggers participating in the Charity Preston's Five-Star Blog Challenge over at the Organized Classroom Blog. I'm participating as well because prior to this post, all of my posts have included original content. And given how little I've been able to read so far this week, this post may ultimately be original content as well. :)  If you're a teacher blogger and you haven't already investigated the Five-Star Blog Challenge, then you should definitely do so.


5-Star Blogger

Books!

While I haven't been reading blogs as much as I wanted to this week, I've been chugging through a couple of books. I'm still reading How to Assess Higher Order Thinking Skills in Your Classroom, and I still think that it's got a lot of fantastic ideas, but I'm rarely a one-book-till-I'm-done kind of gal. There are just so many other amazing books out there that catch my attention, and then I find myself halfway through five different books until I force myself to finish.

The latest book to catch my eye is Raising the Standards through Chapter Books: The C.I.A. Approach by Sarah Collinge.

It was recommended to me by @annottmar on Twitter, and I love it. It's a new book, so it takes the Common Core standards into account, and it's written in such a teacher-friendly way. The C.I.A. approach stands for C - Collect Critical Information, I - Interpret the Text, and A - Apply the Text to Other Areas of Life. I'm only 38 pages into it so far, but I've really enjoyed everything that I've read. The first chapter was about implementing research-based classroom routines such as instructional read-alouds and building authentic practices. It had very practical suggestions on how to start these in the classroom, and the author included lots of pictures, charts, and directions about what materials to use for each step. I will definitely be referring to this book a lot as I get my classroom organized next year. 

And look what Amazon delivered to me yesterday...


A Lucy Calkins book about Common Core!!! I'm so excited to start reading this. I'm going to start training some of my colleagues on the ELA standards in a couple of weeks, so I will likely be a Common Core junkie for a while. 

I also picked up this book:


One of my colleagues recommended it to me as I was whining about how much my students are struggling with mechanics this year. I might give some of the ideas in this book a test run in these last few weeks of school.

Have you found any books lately that have inspired you? Please share in the comments section!

Happy reading!

Friday, April 20, 2012

Friday Freebie: Reading Informational Checklist

Last week, I shared a 4th grade CCELA checklist that can be used with individual students to assess their progress toward the Reading Literature Standards. This week, I'm continuing the checklists for Reading Informational. You can download your copy by clicking on the image below:


I hope this is helpful to all of you 4th grade teachers out there! Have a great weekend!

Thursday Reading - Biographies

Yes, I know it's called Thursday Reading, and it's being posted on Friday. I have houseguests this week, and it has thrown my schedule off a bit...In my defense, I started to write this on Thursday. :-)

This term, we are studying biographies in our reader's workshop, and we're tying it into our social studies unit on key historical figures and the abolition and suffragist movements.  At the beginning of every unit, we do a lot of read alouds and shared reading to try to determine the characteristics of a genre. As we do that, we build an anchor chart that will ultimately be used as a checklist for my students' final writing piece. This is what we've noticed so far about the biographies we're reading about Harriet Tubman:


Since we're chunking so much reading, writing, and social studies work right now, I thought it might be fun to study a related genre as well, so we're reading memoirs by people unrelated to our unit, and comparing and contrasting memoirs with biographies and autobiographies. It's definitely a fine line between the genres, but my students have been doing a good job so far of figuring out some differences.


Their big project this term will be researching and writing a biography of someone we studied this year, but I'm thinking I might try to have them write a short memoir as well to convey some aspect of their time in 4th grade.

I really like working with closely with 1-2 genres to help students see some of the nuances of that genre reoccur in several books. I think it helps students understand the concept better, and it builds their inquiry skills as they read to find the answer to the question "What are the characteristics of biography?" or "What makes a biography different from a memoir?"

Do you study biographies in your classroom? What are some of the resources or activities that have helped you in this process?

Wednesday, April 18, 2012

Wednesday Writing: Keynote

One of my favorite things about the new Common Core English Language Arts standards is the range of writing standards (W.10). What it basically says is that students will be expected to develop writing fluency; that is, they'll be able to write in many different contexts and subjects, for different audiences, purposes, and effects, and with long and short pieces. I love to teach writing, so I'm excited that it will finally be emphasized more broadly.

This year, one of my favorite apps to use with my students for short writing pieces has been Keynote. Traditionally, I thought of Keynote as the Mac equivalent to PowerPoint, and it can certainly serve that purpose. But Keynote can also be a good tool to use when you want students to write a very short piece or synthesize information and maybe incorporate a picture or two.

A couple of weeks ago in Social Studies, we were studying the invention of the telegraph and how it impacted society. We read a few different articles about it, and then I asked students to synthesize the information by creating an award for the telegraph. They had to create one slide using both pictures and text that said, for example, "Award for Best Communication Device of the 1800s" or something like that. They then had to describe why the telegraph was deserving of that award, and I let them include a message in Morse Code at the end. Here are a couple of examples:

I love how they connect the invention to emailing. I'm sure the concept makes more sense to them that way, but it's funny because there were so many inventions and innovations that had to happen after the invention of the telegraph before we could get to email. But alas...

This project took less than an hour from start to finish, and that includes the time it took to read the articles. We frequently use Keynote for these one-page type projects, so the students are very knowledgeable in how to use the app. 

This is just one example of how we use Keynote to build writing into our daily routines. What kinds of writing have you been doing in the classroom lately? Please share in the comments section!

Tuesday, April 17, 2012

Tutorial Tuesday: Symbaloo

Last week, I shared some information about how to use QR codes for differentiation, and I got some great feedback - including some messages from people who wished they could use QR codes but don't have access to the smartphones or iDevices to use them. So this week, I want to share another useful tool for differentiation: Symbaloo.

'Symbaloo is a free site that allows you to create "webmixes" that are essentially bookmarks to other sites. The webmix is composed of tiles, and you can arrange them any way you want to. You can also share them with others.

Getting Started

After you've created an account with Symbaloo, you should look at the tabs at the top of the page and click on the blue plus button. This will create a new webmix. From there, click on any tile and hit the plus button.


This will open a menu to create a new tile that looks like this:

Tiles can be websites, RSS feeds, or audio. Websites that have their own logo (e.g., BrainPop or PBS Kids) will often have their logo automatically import onto the tile. Other sites may require you to design a tile yourself. You can choose background colors, icons, or upload your own image. Once you're done selecting your preferences, just click on "Add tile to webmix."

*Tip: I recommend clicking the box that says "Display the name on the tile" - especially if you end up choosing your own icons. It can make it easier to edit or give directions later on.

Tiles can be arranged in any way you want them on your webmix just by dragging and dropping them into place. 

You also have the option of changing some of the features on your webmix by going into "Edit webmix" on the main screen.

From here, you can change the background color or image (click "Change wallpaper"), adjust the number of tiles by clicking on the blue arrows at the left and right of the screen, or rename the webmix. When you're done, click "Done editing."

When you're happy with your webmix, click the "Share" button. That will pull up this option:
From here, you have two options:
Option 1: Share it publicly so that anyone else may search and find it.
Option 2: Share it privately so that anyone who has the link may use it. This is the option that I use when I'm differentiating for my students, and I post the link to the webmix at our class website.

Differentiating

I use Symbaloo to differentiate by creating a tile for each of my students.

I link a particular website or activity with each student's name. Then, when the student clicks on her name, she can go to the particular site that I've assigned for them. It's a little labor intensive when you first set it up, but it's very user friendly for students, and it works on both computers and iDevices.

The Gallery

Symbaloo also has a gallery of published webmixes that you can browse or search.


Here's an example of one that I found when I was searching for math activities:


I really like how it's visual -- kind of a combination between iPad app icons and Pinterest.

How could you use Symbaloo in your classroom?


Monday, April 16, 2012

Management & Mentoring Monday - Assessing Student Work

Having just temporarily recovered from working on report cards, I thought I'd share a little about a technique I use for grading student work.

Rather than standard letter or number grades, we grade our students on a scale of 1-4. We have specific rubrics for our standards, but they're generally designed like this:

  • A "one" means that even with additional support and scaffolds, the student is not yet successful with the task.
  • A "two" means that the student can do the task with support.
  • A "three" means the student can complete the task accurately, consistently, and independently.
  • A "four" means the student shows a level of understanding that exceeds expectations for fourth grade.
The goal for most students is to get a three.

At the beginning of the year, I introduce this using the terms "novice," "apprentice," "practitioner," and "expert."

(Forgive the faded, gross-looking green marker. I'll be making cuter posters next year...)

We use this poster to talk about the meaning of each term, and I'll regularly have students hold up 1-4 fingers to self-assess at the end of a lesson. It's a good way for me to monitor who is ready to get started working independently and who will need a little more help. 

When it's time for me to grade student work, I can use my district's 1-4 scale, and it lines up fairly well with this self-assessment scale. Usually I can quickly spot-check and tell who is a 1 and a 4 on an assignment; it's just the 2's vs. 3's that take a little longer to decide sometimes. 

Update: Stephanie over at 3rd Grade Thoughts has made posters using this language. Head over to her blog to get her freebie!

What do you use for self-assessing in your classroom? Feel free to share in the comments section below!


Saturday, April 14, 2012

Weekend Reading

Every Saturday, I'll be sharing my favorite reads from the previous week so you can meet some other fabulous bloggers that you may have missed or find some new teaching resources.

From the Blogosphere

Off the Bookshelf


I'm preparing to redeliver a workshop about the Common Core English Language Arts standards to the teachers at my school, so much of my reading is related to that. One of the big topics we'll be talking about is assessment of the new standards, so I'm reading the How to Assess Higher-Order Thinking Skills in Your Classroom book by Susan M. Brookhart. I'm only a couple of chapters into it, but I really like it so far. It's an easy read, but it has lots of practical ideas and suggestions for planning for and assessing each level of Bloom's Taxonomy. I can tell that this will be a book that I revisit several times even after I finish reading it.

What have you been reading or writing this week? Feel free to share links to your own blogs or those of others in the comment section below as I'm always looking to find new blogs to read throughout the week!


Have a great weekend!

Friday, April 13, 2012

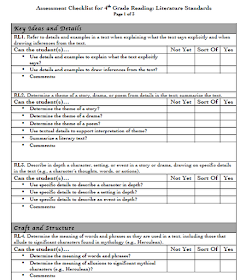
Friday Freebie: Common Core Assessment Checklist

I use checklists a lot. They help me see what I need to teach and where students still need some help. Sometimes I will make checklists that assess the class as a whole, and other times, I will use a separate checklist for each child.

I like to break it down into three categories:

Yes - the student shows evidence of mastery
Sort of - the student is close to mastery but still needs a bit of help, or
Not yet - the student is not yet able to master this standard

I've started to work on some assessment checklists for next year with the Common Core ELA Standards for 4th grade, and I wanted to share the one that I've made for Reading Literature.

https://docs.google.com/open?id=0B8y-ZrUhAbCnc05MZ0tUS01SeDJuU0NwU2hYR1B0Zw

Click on the image above to get your checklist.

Do you use checklists? What are some of the ways you use checklists to help you in the classroom? Share your thoughts in the comments section.

Happy Friday!

Thursday, April 12, 2012

Are you a GoodReader?

I've always been a huge fan of Stephanie Harvey and Anne Goudvis's classic text Strategies that Work. But there were some aspects of it that didn't work for me. The sticky notes, for example. Yes, I understand that it's a good compromise for getting the kids to track their thinking without writing in the book, but more often than not, the sticky notes became a track that linger longing than I'd like. They get left behind in books, fall out onto the floor, and attach themselves to shoes. And when we get right down to it, real readers don't usually use sticky notes. When I buy books -- for book clubs or professional reading especially -- I write all over them. I underline text, I write in the margins, I circle key words, and I sometimes even go back with a highlighter. I needed a way to get my students to see and do that also without breaking the bank or copyright laws.

Meet my new favorite app, GoodReader. ($4.99 in iTunes).


GoodReader allows you to annotate over .pdf files, websites, word .docs, and more. You can underline, highlight, draw pictures or boxes, type text, and create "sticky notes." It's allows us to apply all of the great "strategies that work" in a way that is more realistic and practical and far less messy.

Here's an example of an annotated text in GoodReader using some of the features.

The text is from a Reading A-Z leveled book, and we were working on collapsing sentences for summarizing (hence the "And" in the margin). But you can see the toolbar of annotating options on the right, and how that looks on the text. There's also an example of a "sticky note" in the center of the page. If you tap it, it will expand to reveal a longer, more detailed note.


As we later discovered after playing around with the app for a while, you can even change the shape of the sticky note to make question marked shaped ones.

Here's an example of the poster we use in our classroom to help us use consistent annotating features.

I have to say, this has been my favorite app to use with my students, and I think the possibilities with this app are limitless. We don't have many paid apps on our iPads because of the expense, but if you have the option of getting a few paid apps to use with students, this one is absolutely worth it. We're only really scratching the surface of what can be done, and I'm excited about exploring this app more next year.

Do you use sticky notes or think marks for reading with your students? What strategies do you use to help teach your students how to annotate texts? I'd love to hear your suggestions in the comments section!


Wednesday, April 11, 2012

Wednesday Writing: KidBlogs

Last year, I discovered the wonderful educational blogging site KidBlog. It is a completely free, user-friendly, and secure site that students can use for writing.


Blogging with students can be an exciting, yet challenging experience because it involves writing for an online audience. In the past, when students have published their writing in Writer's Workshop, they've had moments to sit in the author's chair and read aloud their published pieces. They could inject meaning through the way that they read their work or fill in random missing words as they were reading aloud. Blogs are really different, however, because you're putting your work "out there" for others to read, and your written words have to speak for themselves. It really increases the demand on student writers, and it shows in the quality. 

This year, I've had my students use KidBlog to write four book reviews. I also have them comment on the blogs by other students in our class. I moderate both the posts and the comments so I'm able to see exactly what the kids are saying. I also participate in the conversations through my own comments. Currently, all of the settings are protected so that only my students and I can see the blog posts, but I'll be sharing some of the content and routines we use with you in future posts. In the meantime, if you are interested in getting started with having your students blog, or if you just want to improve the process, I would very highly recommend checking out Langwitches Blog. Silvia has an amazing collection of resources for integrating technology in the classroom, and she has an entire unit developed on student blogging. 

Do you blog with students in your classroom? If so, how do you use blogs? If not, what are the biggest obstacles or challenges that you anticipate with using student blogs? Feel free to sound off in the comments.

Tuesday, April 10, 2012

Tutorial: Use QR Codes for Differentiation


Differentiating instruction is a big deal in my school, and for good reason. I have 26 students with a wide range of instructional needs -- from early intervention program to gifted -- and one-sized instruction never works. One of the biggest obstacles that I've found for differentiating, however, has been the management of the tasks. QR codes have helped me solve that problem.


Step One: decide what you want the students to do. 

Let's say we're studying biographies in reader's workshop, and I want students to read about Harriet Tubman. I'll try to find at least 3 different resources.

One at grade-level reading ability,

one above grade-level reading ability,

and one below grade-level reading ability.


Step two: create a QR code for each website that you're assigning.

I like to use Google's QR Code Generator.


Next, you'll get an image that looks like this:
From there, I'll right-click on the QR code and choose either "Save Image As..." or "Copy Image" depending on whether I'm ready to make labels with the QR codes. 

Once you've made a QR code for each website you're using, you're ready for the third and final step.

Step three: assign the QR codes to students.

For this, I typically use 2x4 inch labels. On the left side of the label, I'll paste the QR code. Then I'll type the student's name and any important directions on the right. Most of this is just copying and pasting for as many labels as I need, so the whole process goes rather quickly. It's important, however, to be mindful of what assignment you're copying and pasting because it's not easy to tell the QR codes apart!

I'll put the labels on index cards and distribute them to students. There are some examples above.

Step four: read the picture using a scanning app.

There are lots of QR code reading apps available for free. One that I've used with my students is called QR Code Reader and Scanner. It scans the QR code and opens the attached link. It is far more efficient and user-friendly than having students type in web addresses.

I teach in a class where I am fortunate enough to have 1:1 iPads this year, but this tip could be done using any iPad, iPod, or smartphone, and you wouldn't necessarily need to have one for each student. This could be incorporated into centers or other work.

Other tips:

1. Consider linking to your own webpage so you can reuse the same QR code. I have a Google Site that I use for my reading groups each week. The students are assigned to a particular subpage on that site, so I can make a QR code for that particular page and assign it to the relevant students. Then I just swap out the activities on that page each week. That's much faster and easier than recreating QR codes.

2. Don't just link to web content generated by others -- make your own assignments and use QR codes to assign them to students. You can have multiple versions of an assignment in Google Docs, for example, and you could create different QR codes for each version. Or you could have tiered assignments where students will be expected to complete different quantities of work in different timeframes. You could post the directions on your website and link the students to the pages that apply to them.

3. Use QR codes for interactive bulletin boards. I had my students write math riddles, for example, and the solutions were posted as QR codes next to the riddle. (More information about this is coming in a future blog post.)

4. Make an answer key and create a QR code to access it. Let students check their own work when they finish a task by using the QR code. 

Have you used QR codes in your classroom? What are some other ways you could use QR codes in the classroom?